Single Sign-On for the Web UI
The Intelligence Cloud Web UI supports Single Sign-On (SSO) integration with external identity providers using the Security Assertion Markup Language (SAML) protocol for authentication and the System for Cross-Domain Identity Management (SCIM) API for user lifecycle back-propagation.
Available Authentication Types
The platform supports hybrid authentication, allowing both:
-
Username and password login
-
SSO-based authentication
Username and Password Authentication
Authentication with username and password is always available and cannot be disabled.
The username is always the user’s email address, and new users can be created only by admin users, who can send invitations.
SSO Authentication (SAML)
Single Sign-On is disabled by default and can be configured and enabled by admin users.
-
Enabling the configuration automatically enables SSO authentication.
-
Disabling SSO does not delete federated users, but they will no longer be able to sign in.
-
On the first SSO login, if a user already exists with the same email (invited previously), that old user record is removed and its API key is revoked.
|
Note
|
If all users, including all administrators, migrate to SSO authentication, you should not disable SSO as no user will be able to sign back in to re-enable it. If this happens, contact [email protected] for assistance. |
SCIM API (User Back-Propagation)
SCIM allows your identity provider to manage user access automatically.
Meaning of Back-Propagation
Actions performed on the identity provider side are reflected automatically in Intelligence Cloud:
-
When you assign a user to the application in the identity provider, that corresponding user account gets automatically created in Intelligence Cloud.
-
When you remove user access to the application from the identity provider, this user is also removed directly from Intelligence Cloud.
-
When you disable or modify a user in the identity provider, those changes also get applied in Intelligence Cloud.
Supported Operations
The following SCIM operations are supported:
-
GET /Users: retrieve all users, with query parameters:-
count(required): the number of items per page. -
startIndex(required): index of the first element, starting from 1. -
filter(optional): filter users, supports only one operationuserName eq "value".
-
-
GET /Users/{userId}: retrieve user by ID, this is an internal id, not the email or Okta ID. -
PUT /Users/{userID}: used for disabling and enabling users. -
PATCH /Users/{userID}: used for disabling and enabling users. -
DELETE /Users/{userID}: delete user.
Authentication
-
SCIM uses a dedicated authentication token, different from the public API token.
-
This token is available on the SSO configuration page in the Intelligence Cloud Web UI.
-
The token is shared among eligible admin users.
-
Disabling SSO automatically revokes the SCIM token.
-
For security reasons, when SSO is enabled again, a new token must be updated in the identity provider.
-
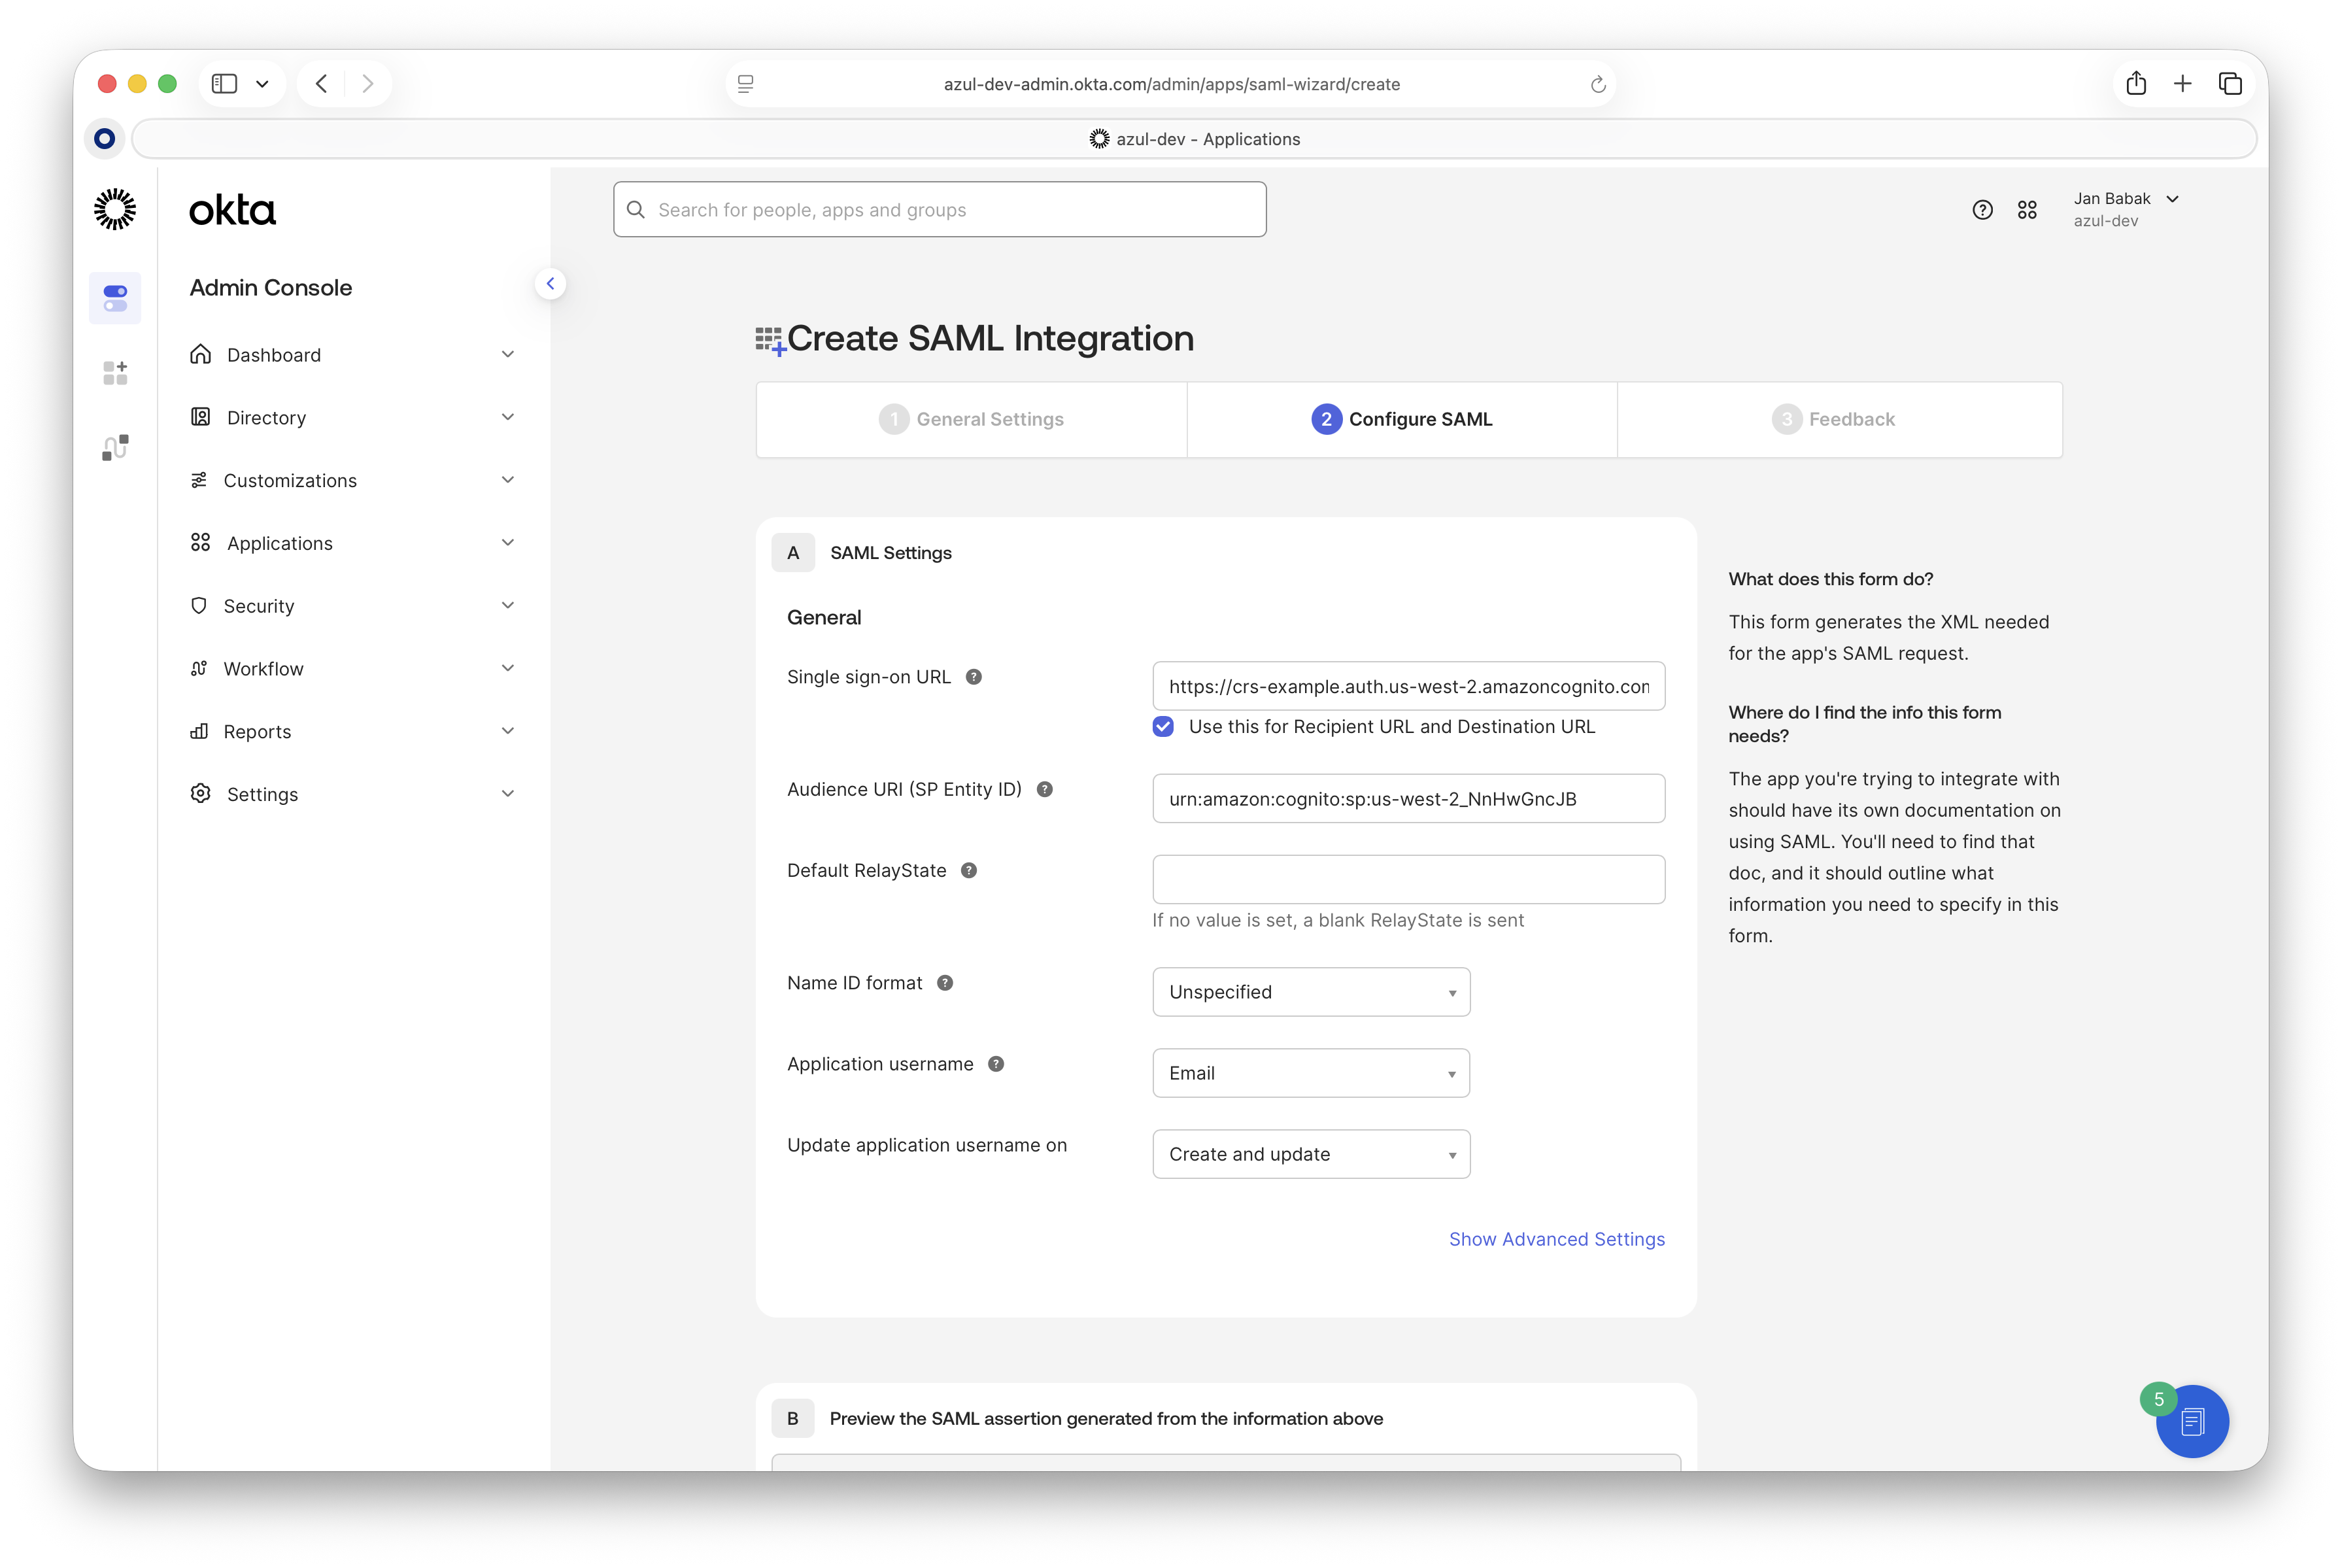
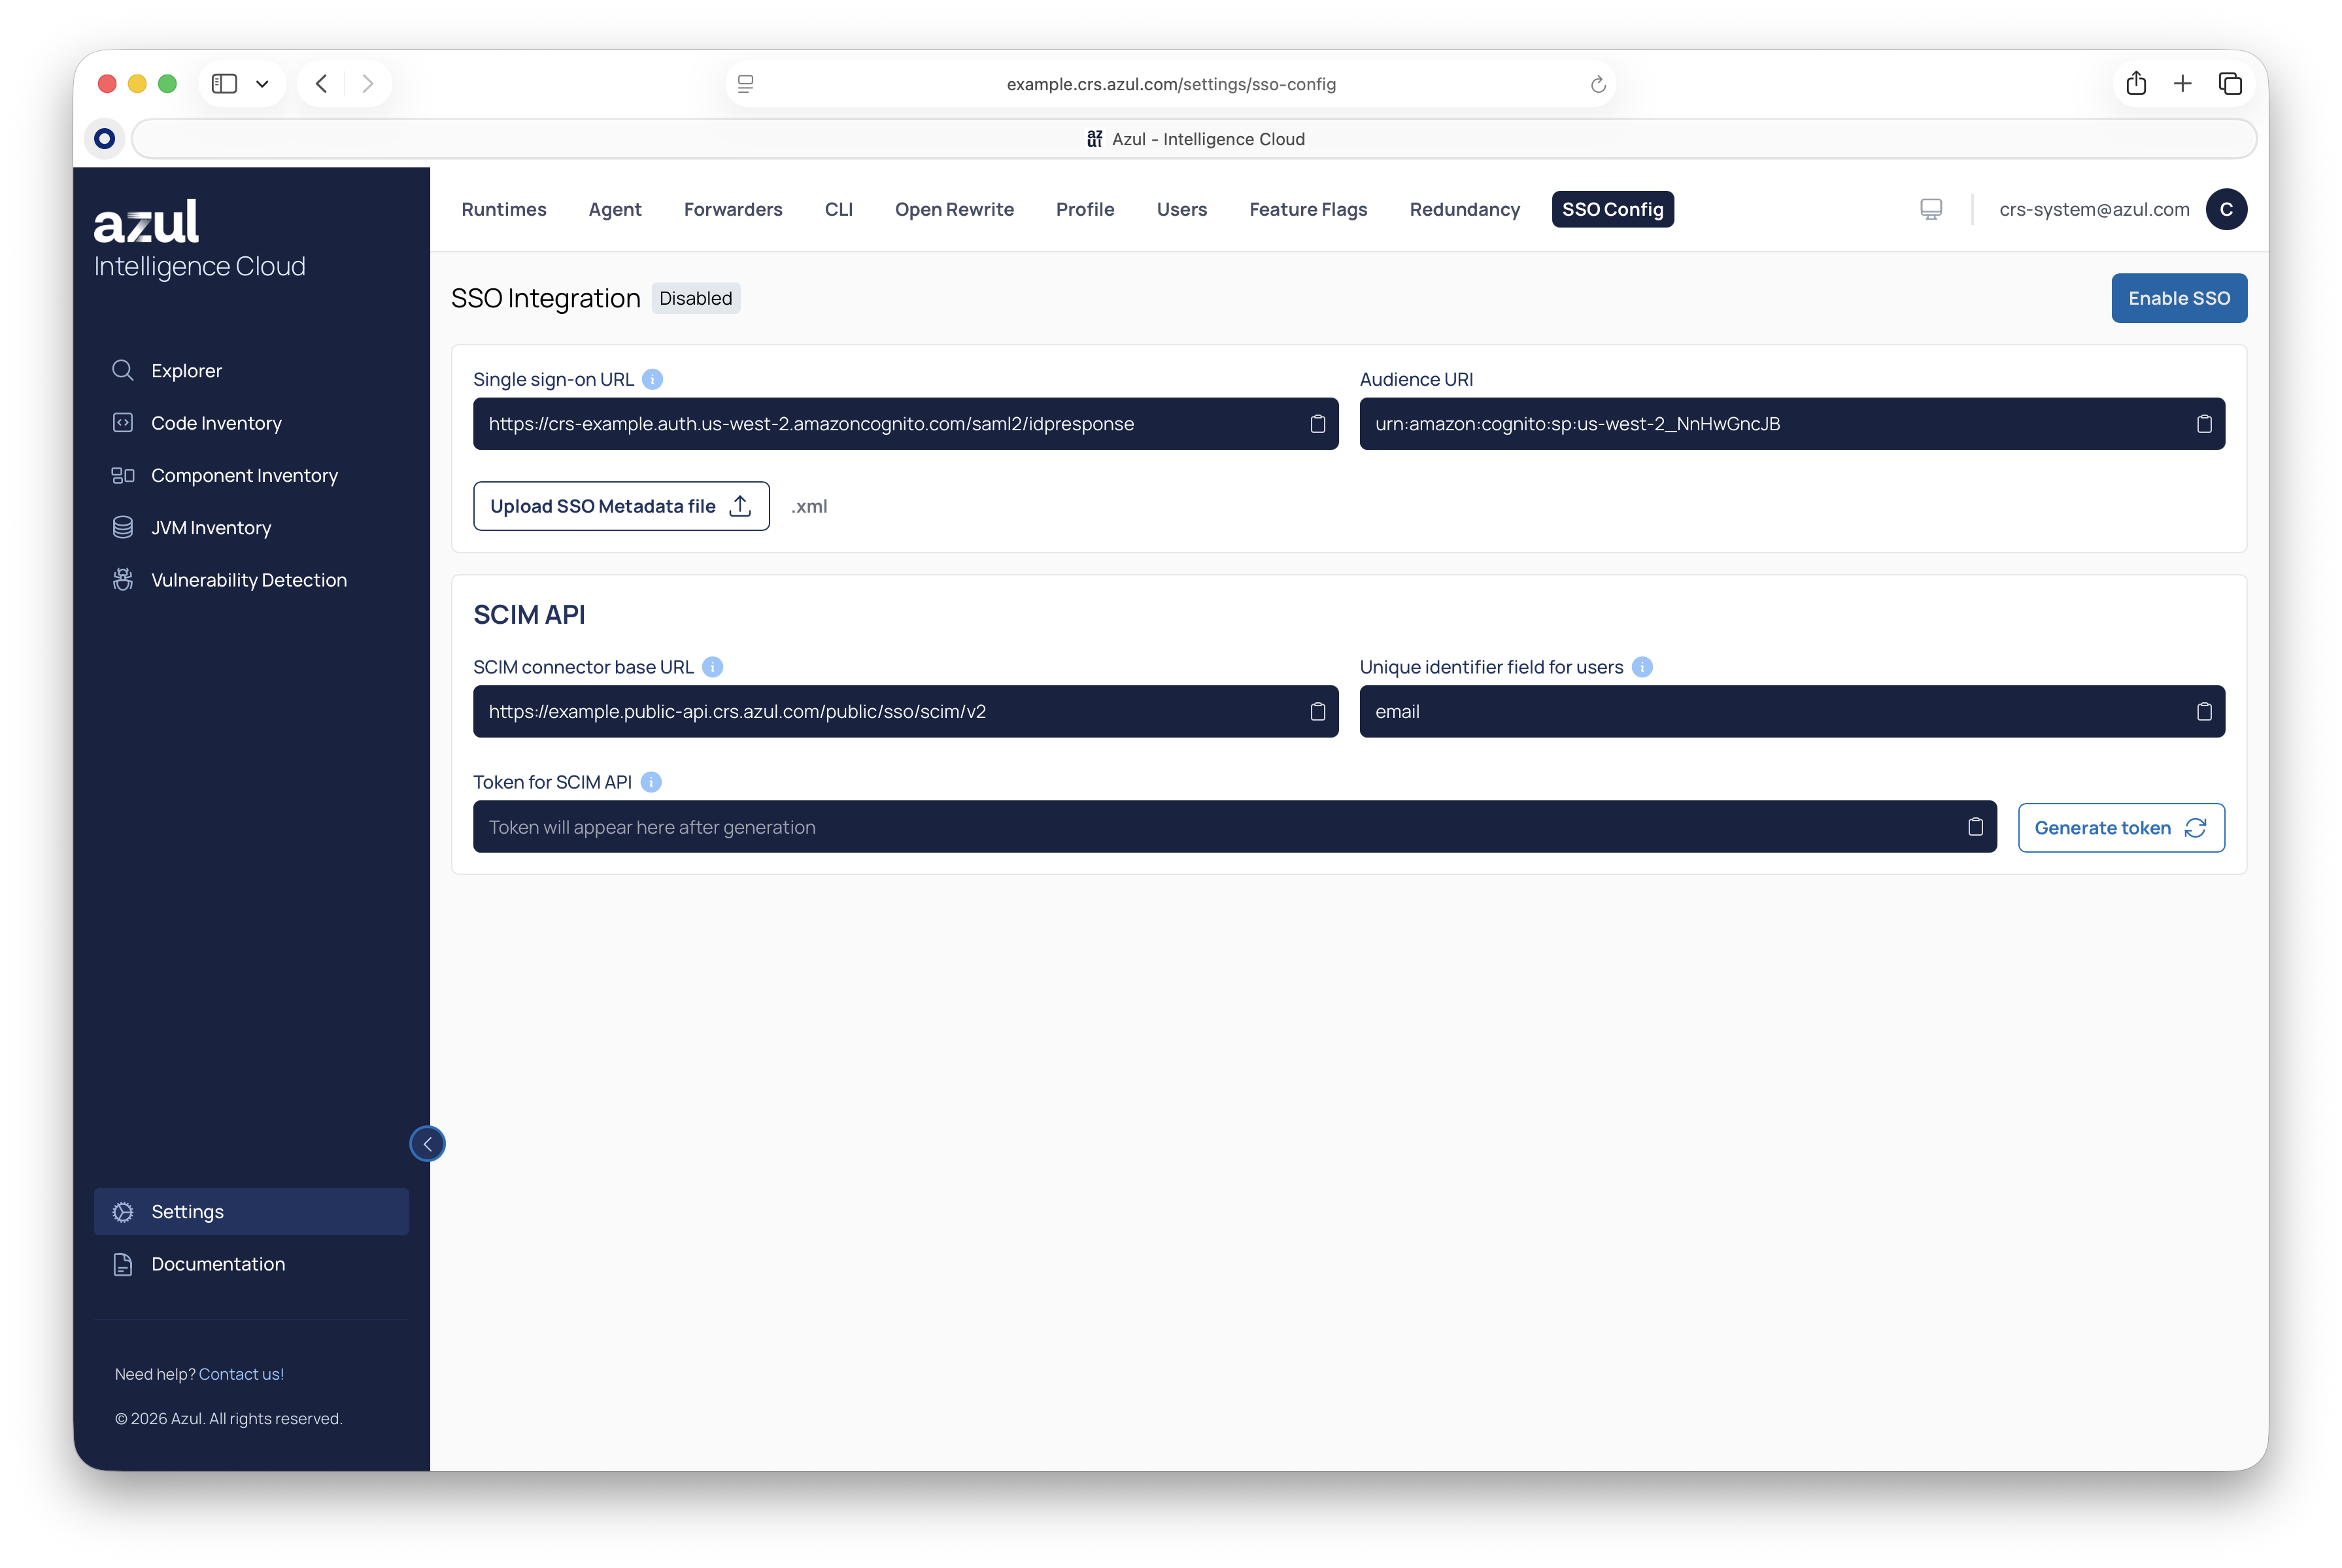
Configuring SSO
SSO in Intelligence Cloud can be configured in the Web UI, only by users with ADMIN privileges, in the "Settings" > "SSO Config" tab.
Basic Configuration
This example describes how to configure SSO for Intelligence Cloud with Okta. Configuration attributes may be called differently in other identity providers.
-
Go to the Intelligence Cloud UI > "Settings" > "SSO".
-
Copy the
Single sing-on URL, andAudience URI (SP Entity ID)there.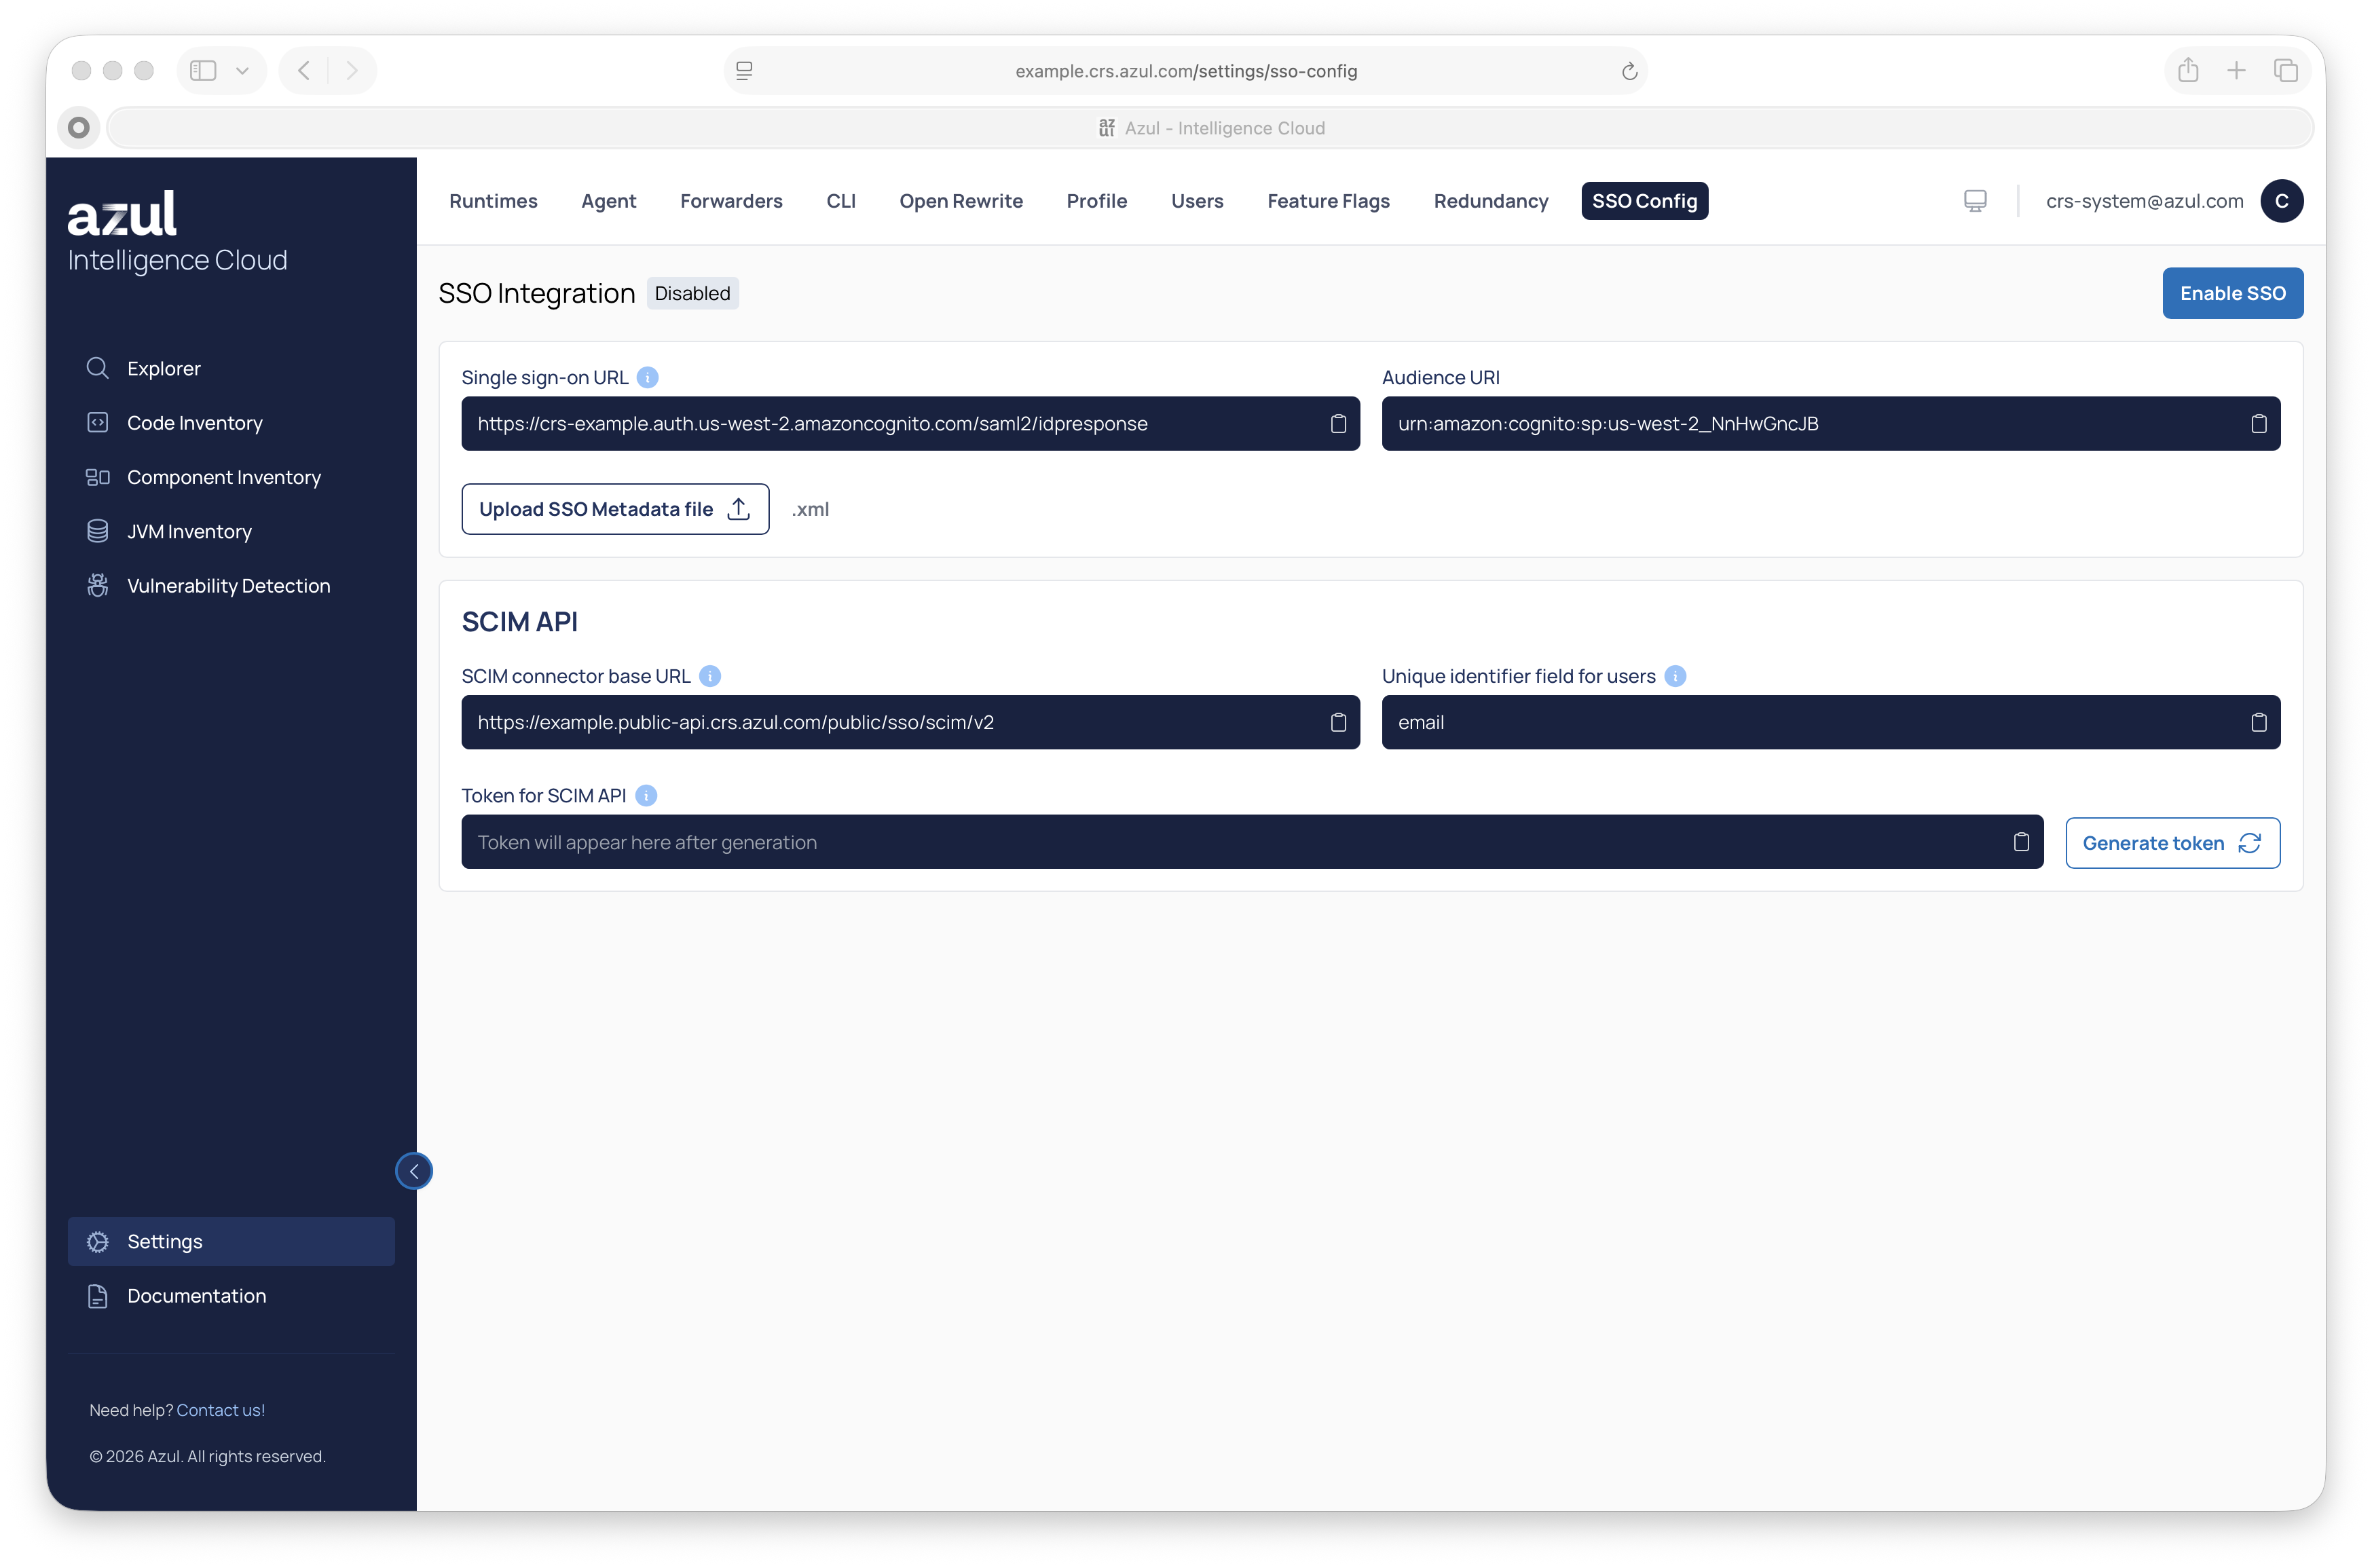
-
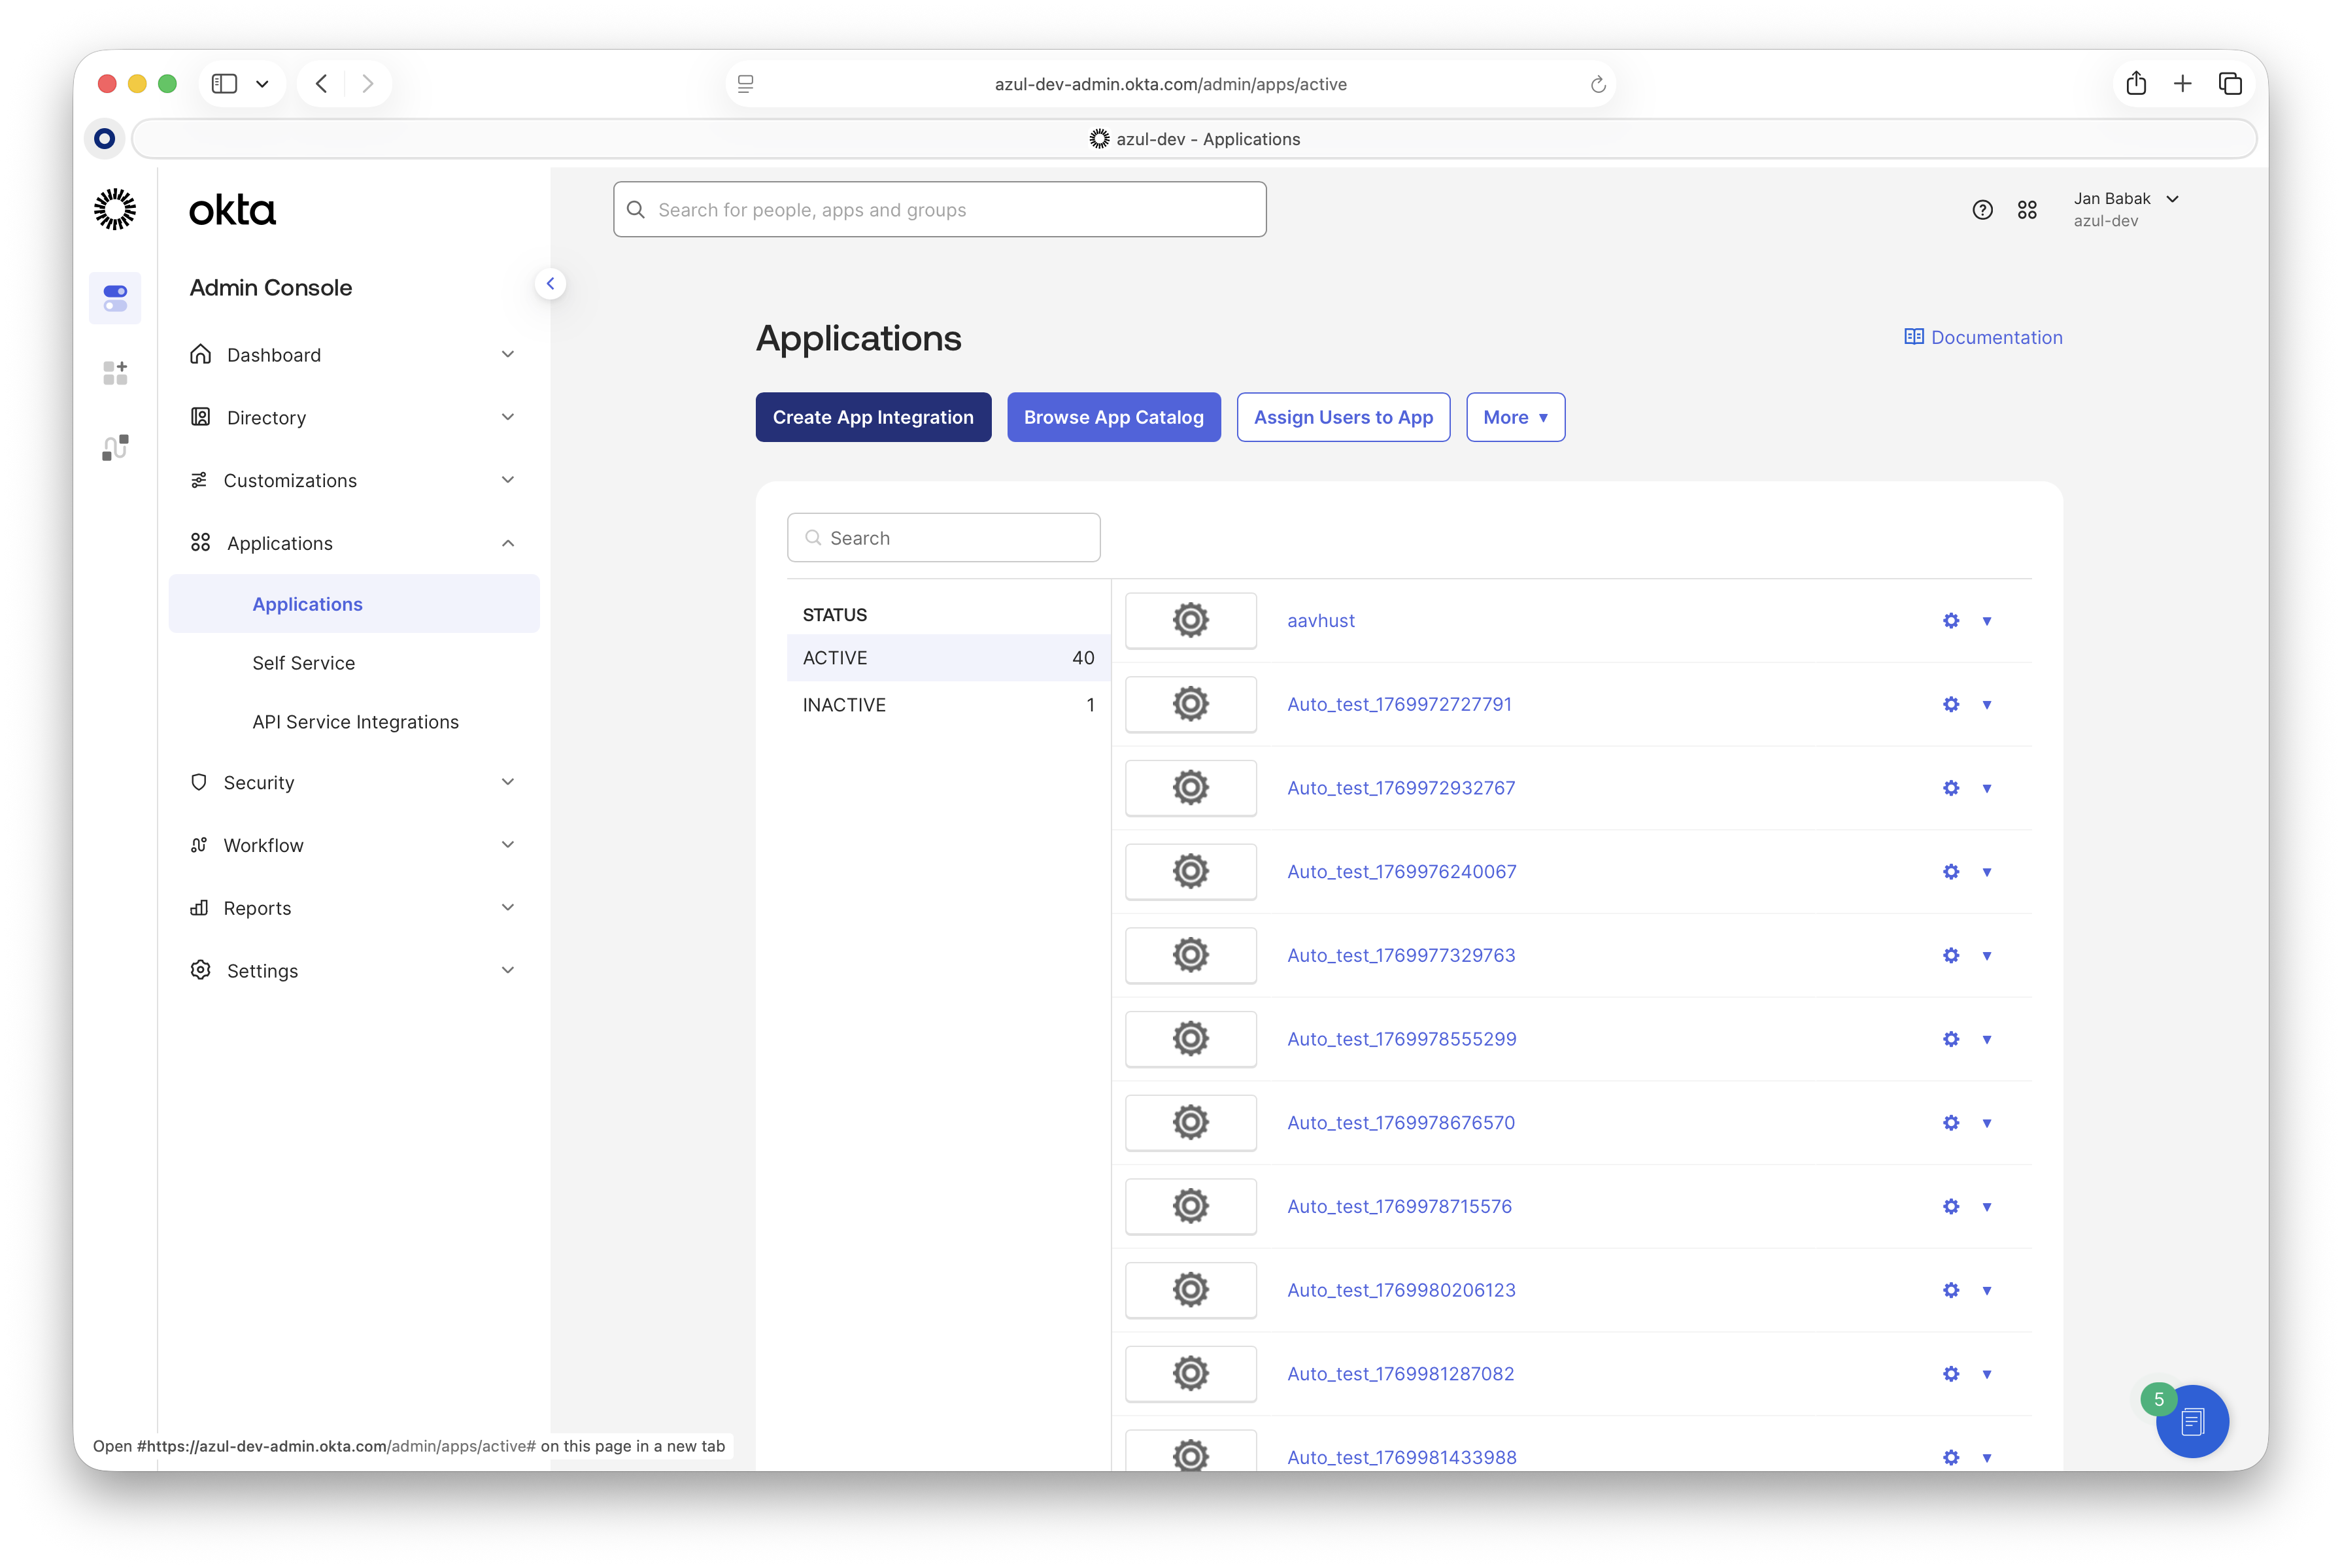
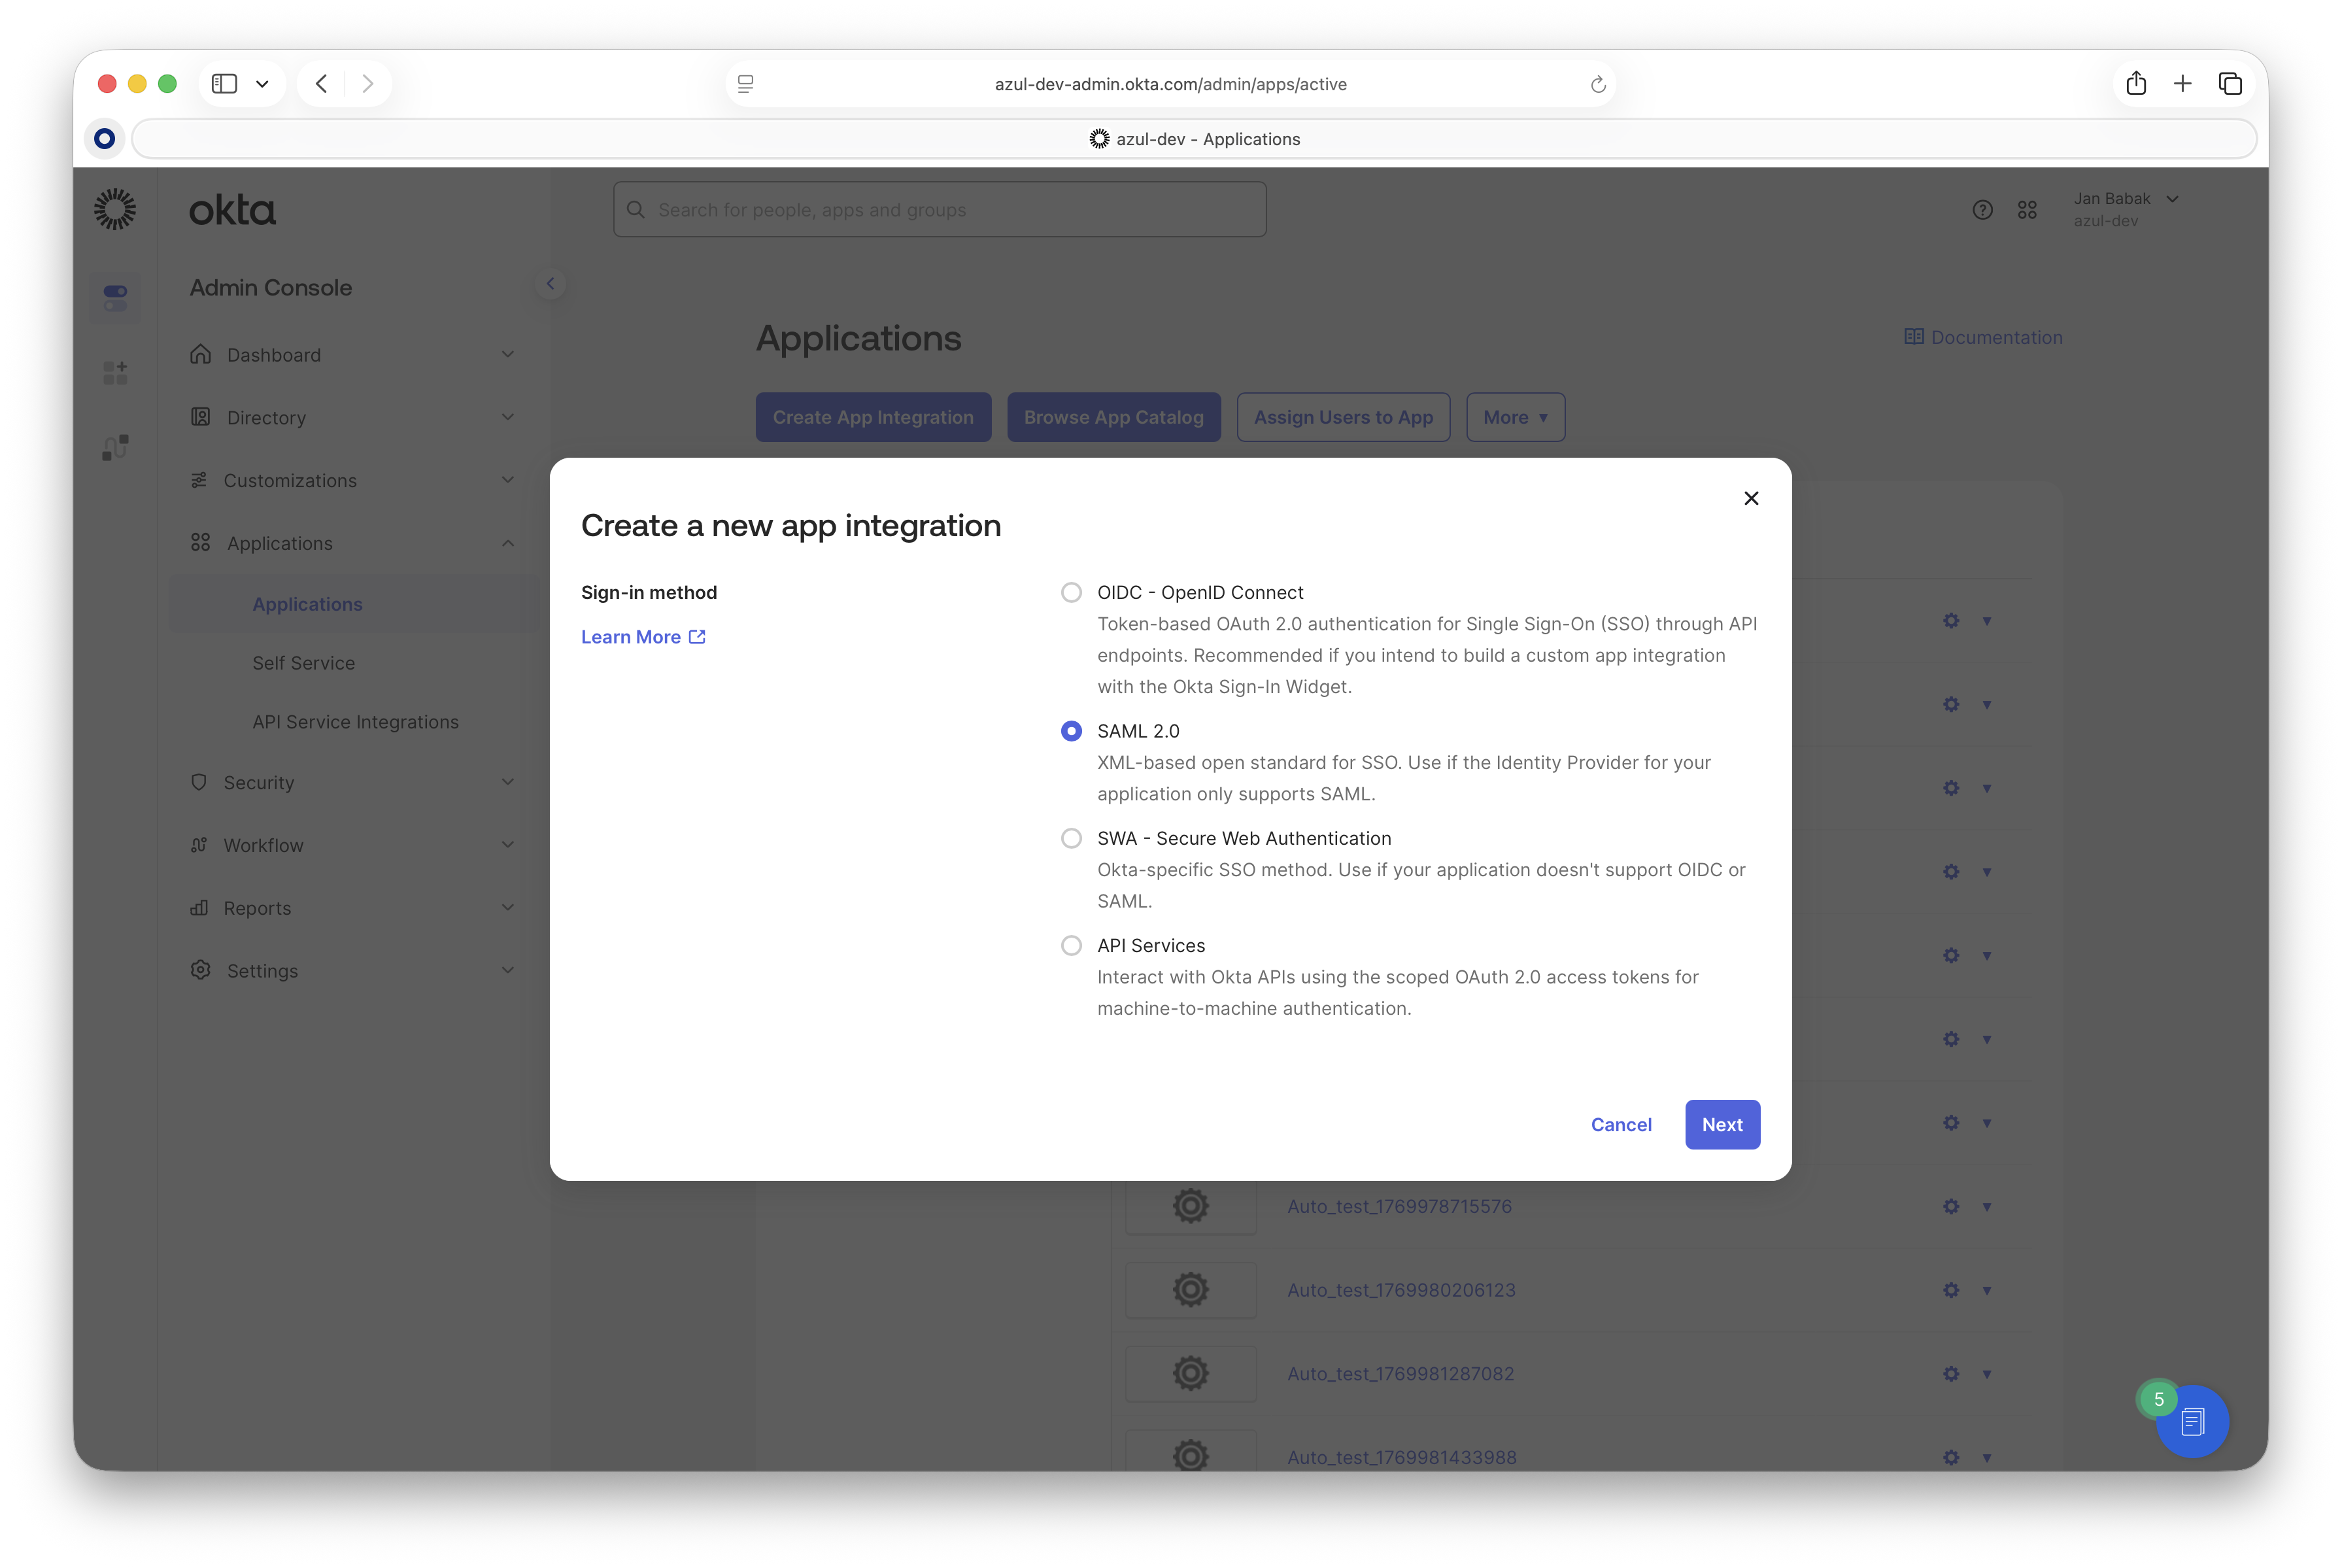
Go to your Okta Admin panel > "Applications" > "Create App Integration".
-
Select the "SAML 2.0" protocol.
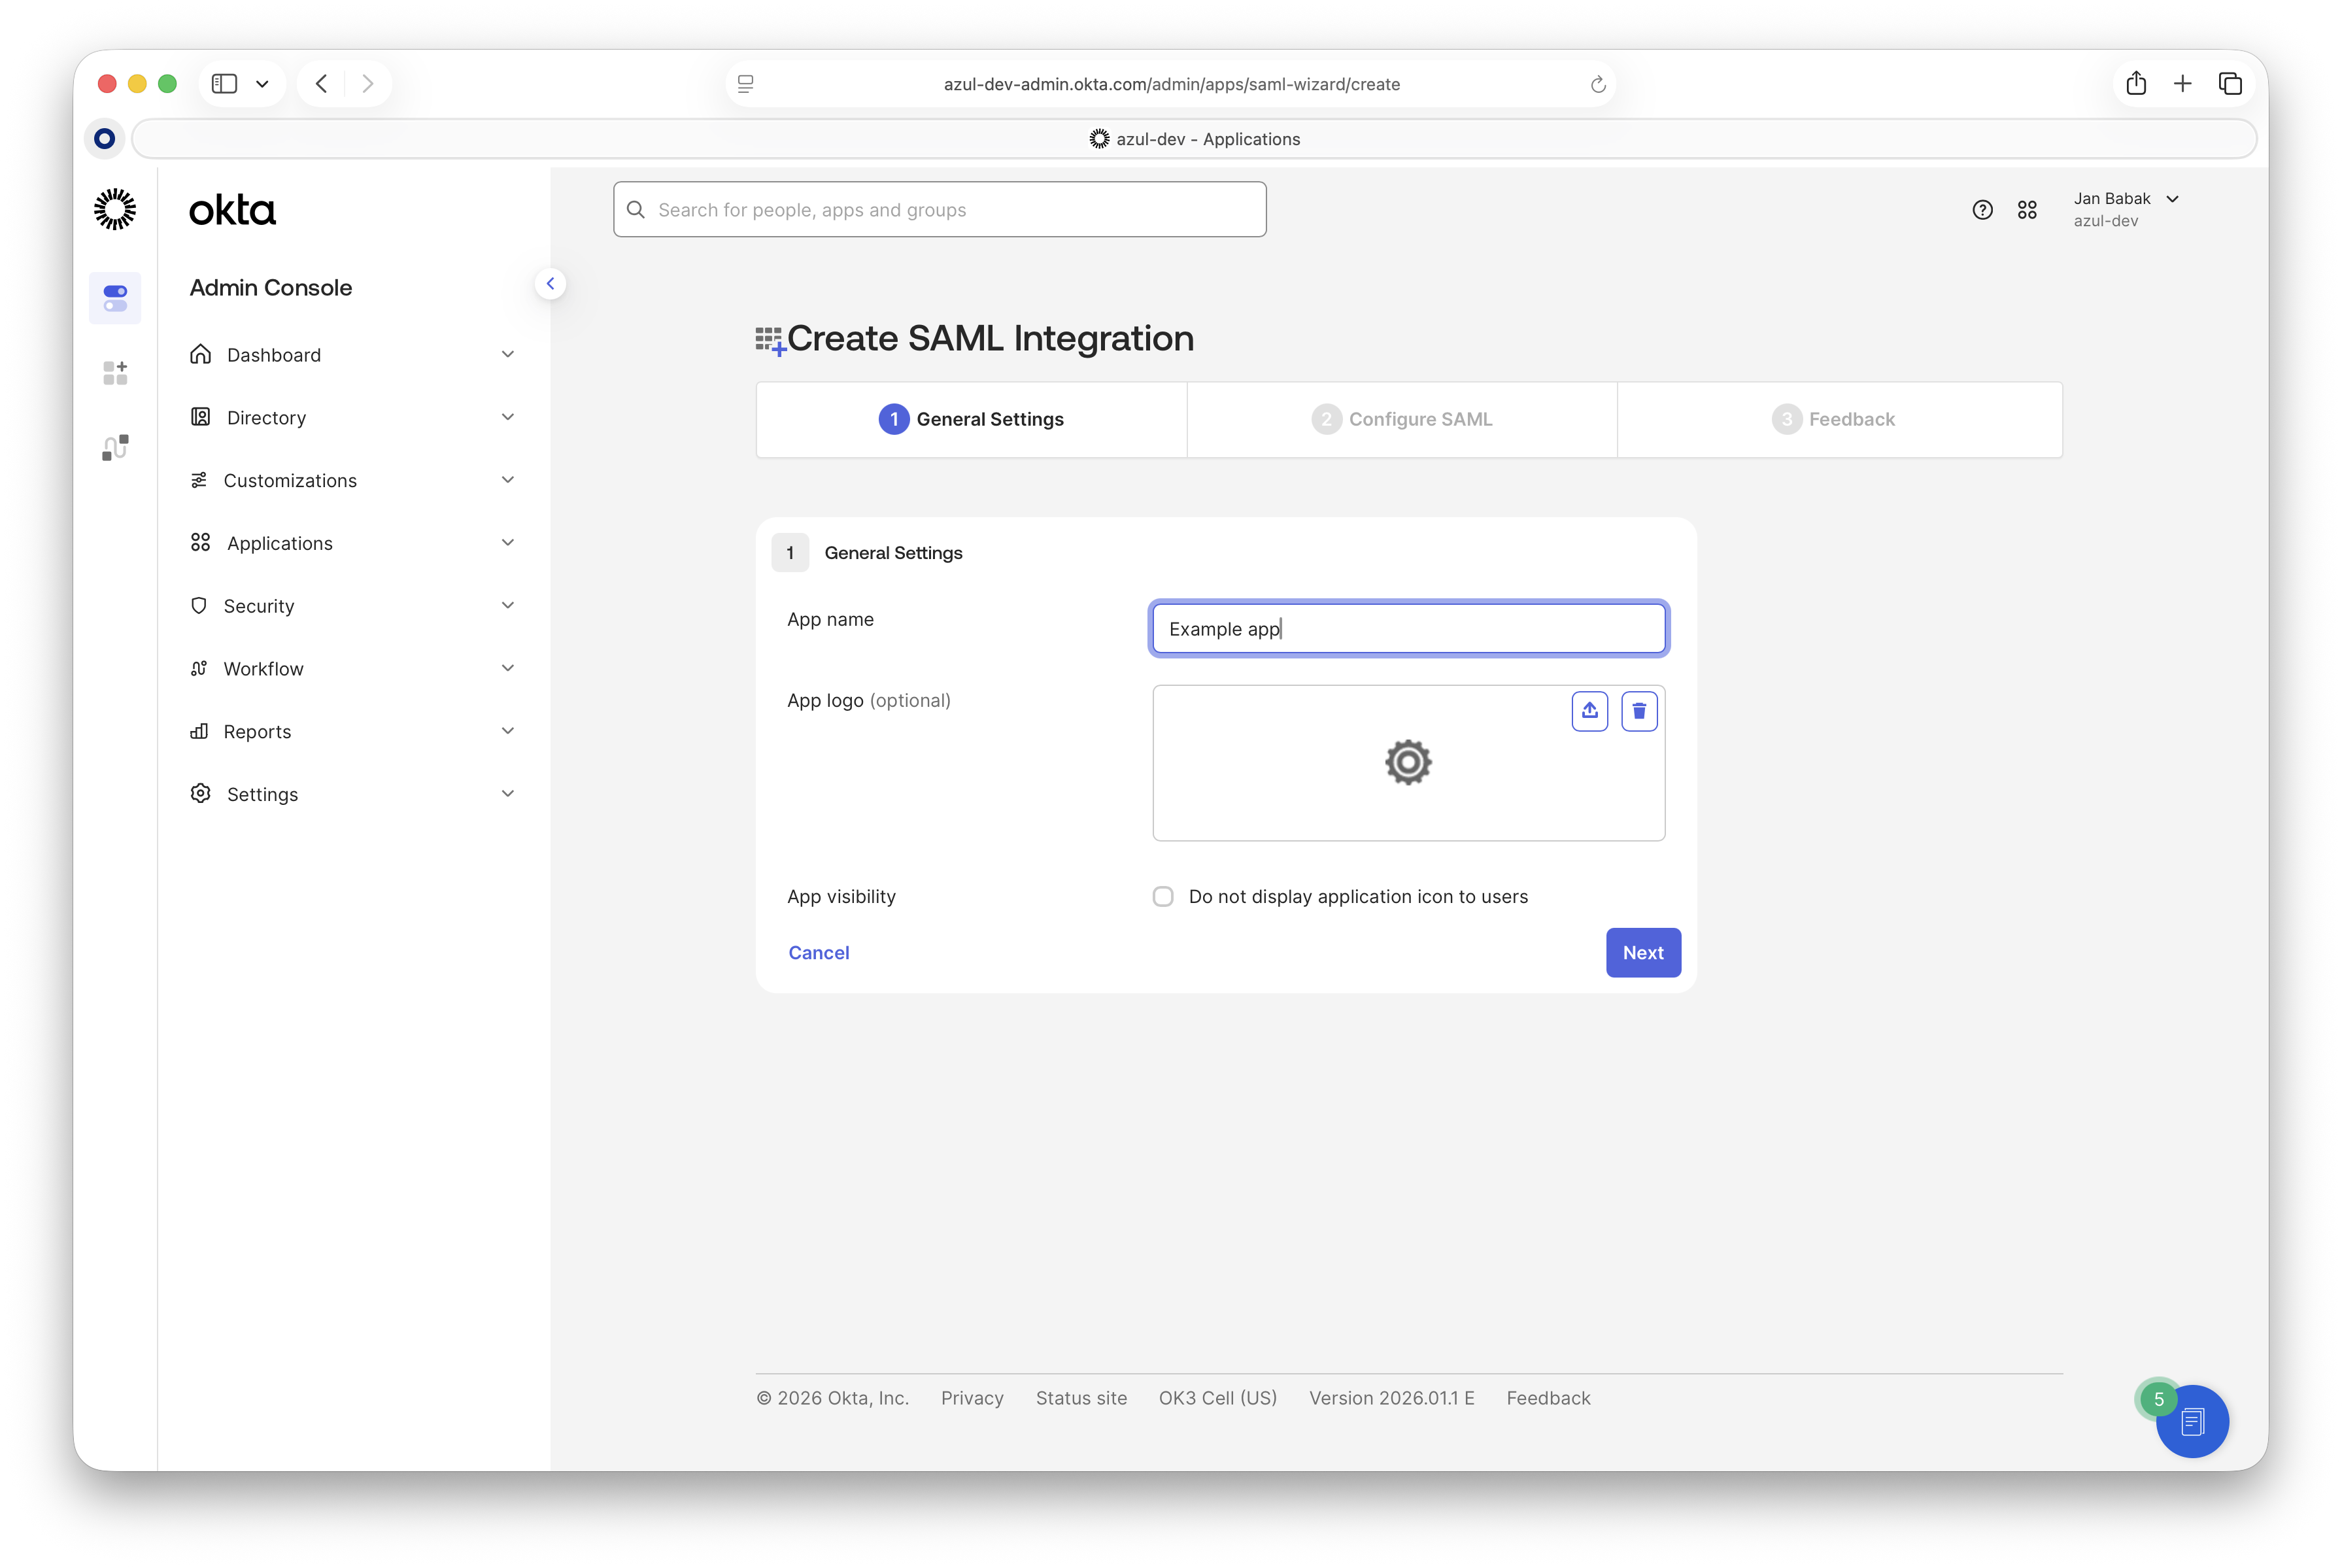
-
Fill in the name of your application in "App name".
-
Configure the SAML settings. In "Settings" > "SSO Config", fill in the "Single sign-on URL" and "Audience URI" with the value you got from the Intelligence Cloud SSO configuration page and set the "Application username" to "Email".
-
Finish creating the application.
-
Go to the "Sign On" page:
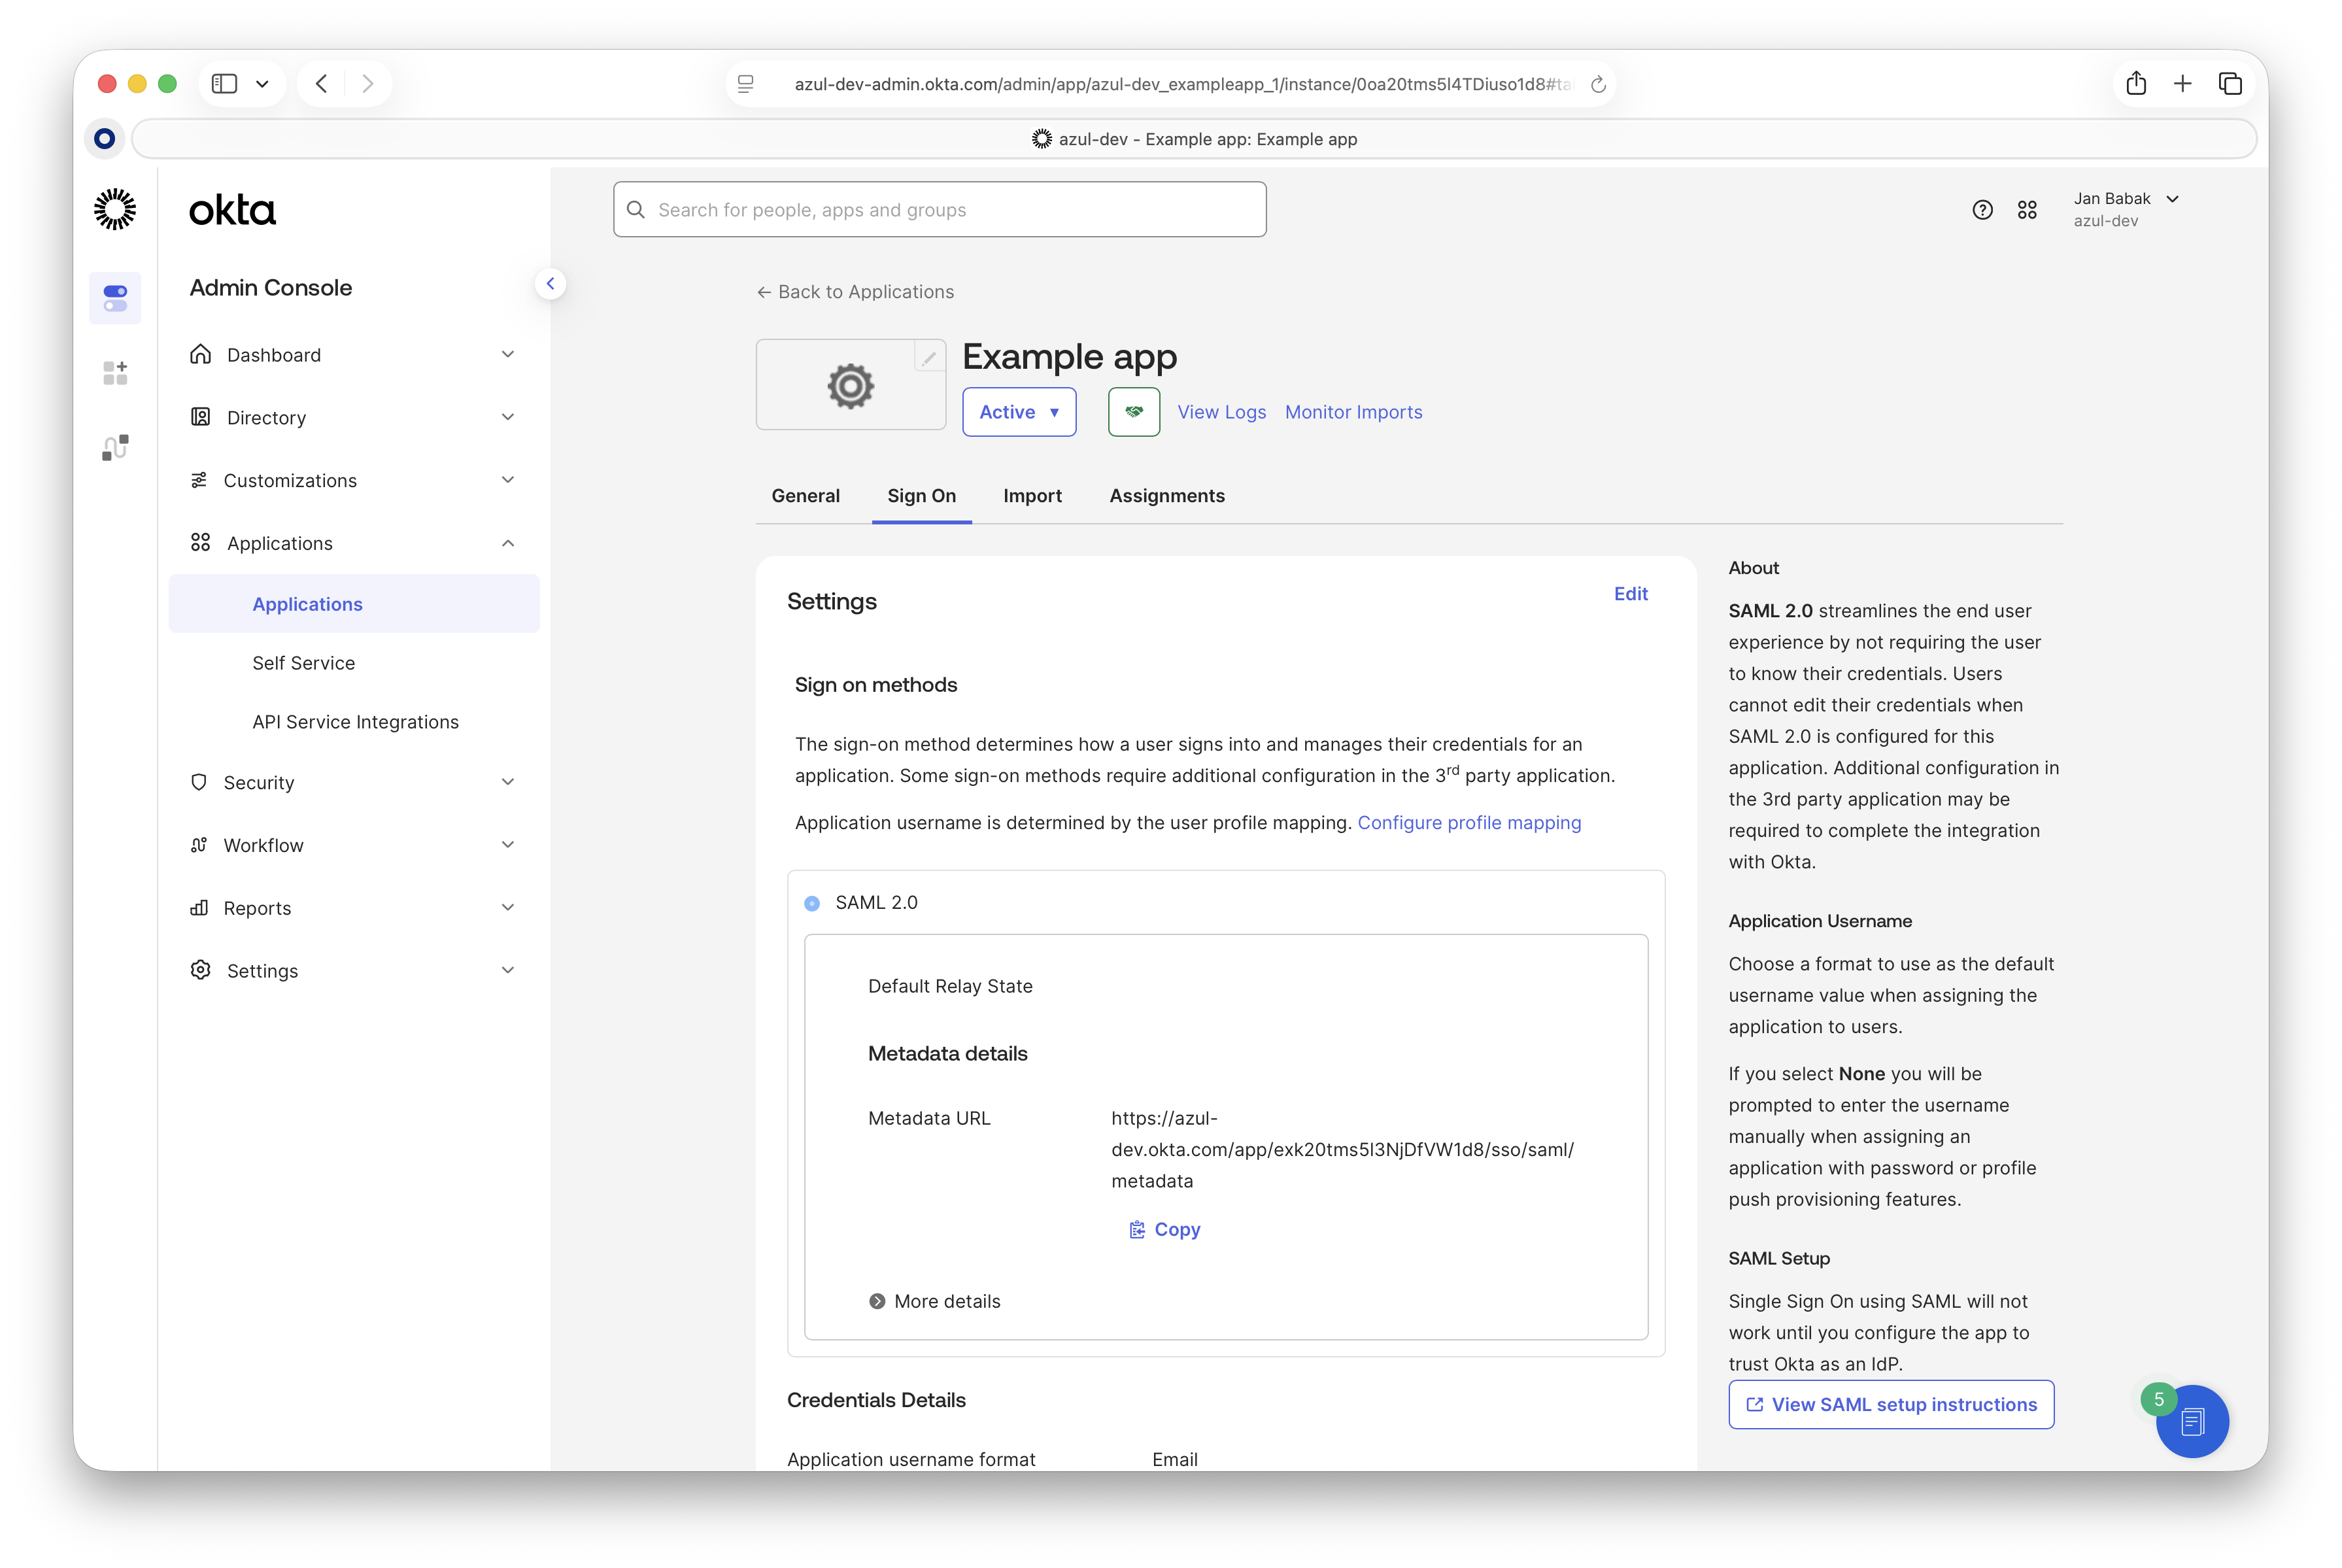
-
Scroll down to the "Attributes Statements" and configure attribute mappings. If you do not use the
displayNameattribute, you may map another attribute (for example,familyName) to it. It’s required to provide theemailandnameSAML attributes.
-
On the same page, under "SAML Signing Certificates", click "View IdP Metadata". This opens an XML file. Save this file locally.
NoteIt’s important to save the metadata XML file, not just the certificate. -
Return back to the Intelligence Cloud Web UI > "SSO Configuration" page, upload the XML metadata file, and click "Enable SSO". SSO is now configured and enabled.
-
If you plan to configure provisioning, it is recommended to do so before assigning users to the application, so all users are provisioned correctly.
If you do not plan to configure provisioning, simply assign users to the application in Okta.
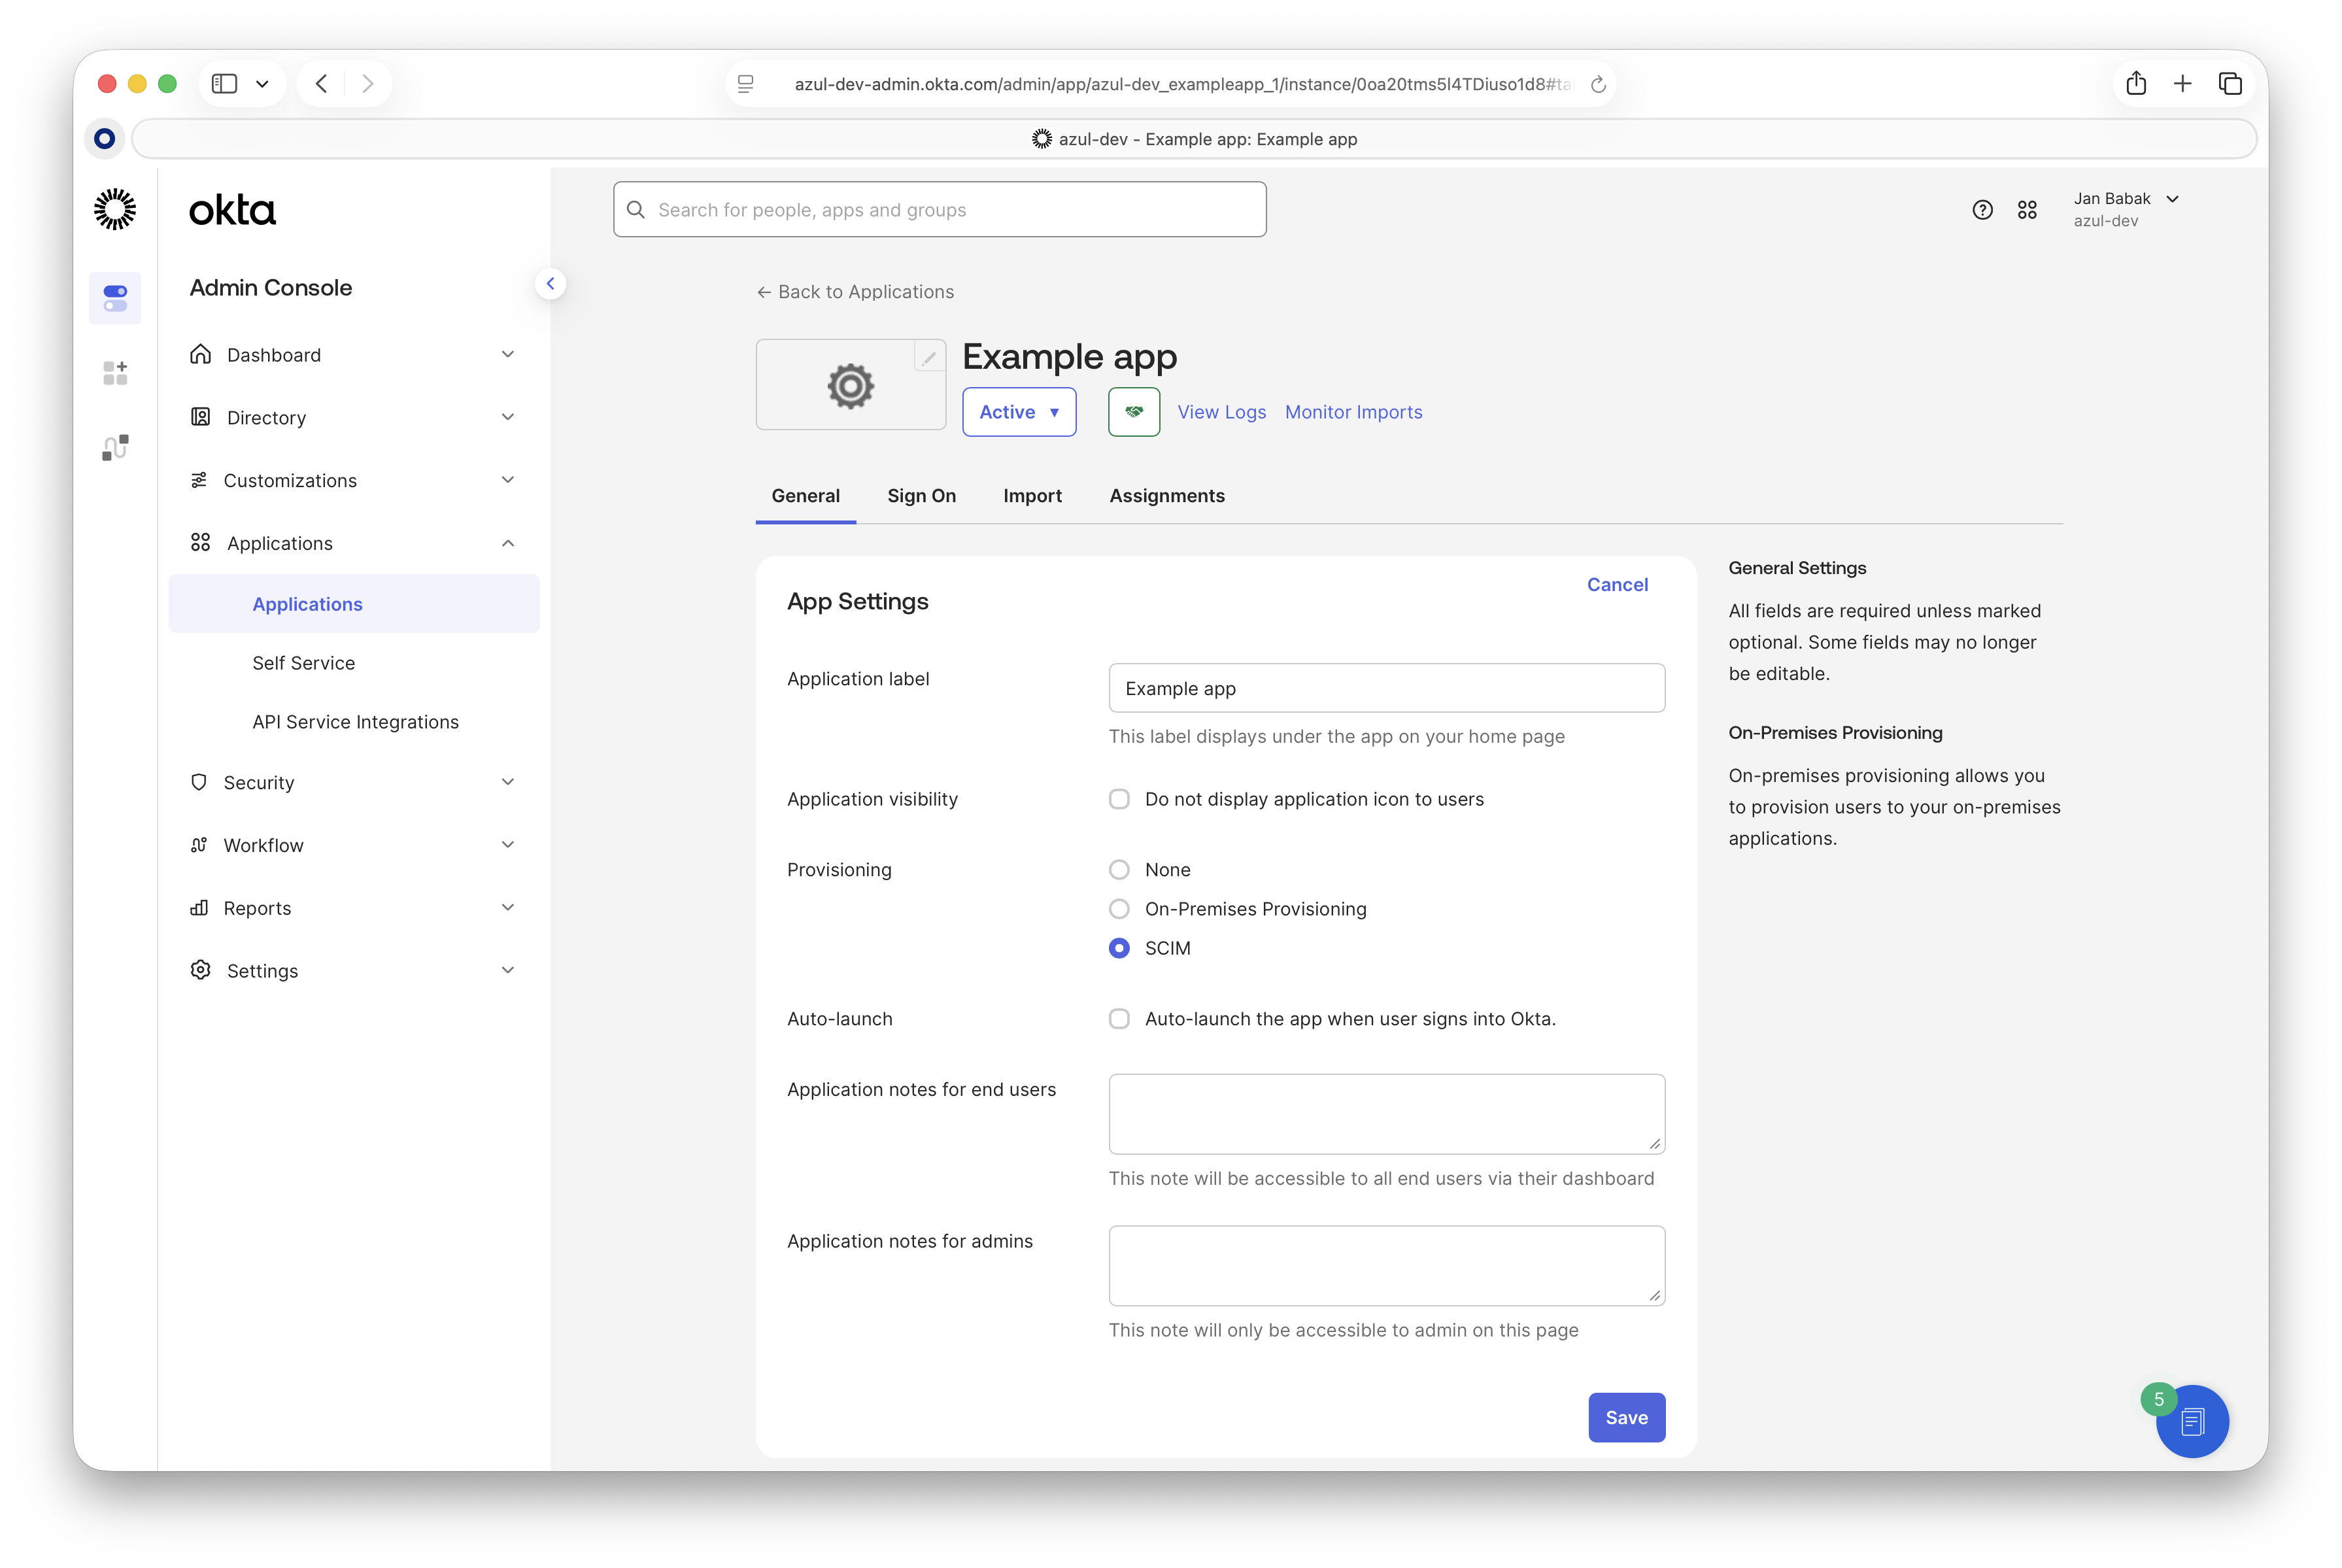
Provisioning SCIM
The following steps describe how to configure SCIM API provisioning and are optional.
-
In the Okto UI, go to the "General" tab and edit "App Settings". Change "Provisioning" from "None" to "SCIM". This enables the Provisioning tab.
-
Open the "Provisioning" tab and edit the SCIM integration.
-
Provide the "SCIM connector base URL" and "Unique identifier", which can be copied from the Intelligence Cloud SSO Configuration page.
-
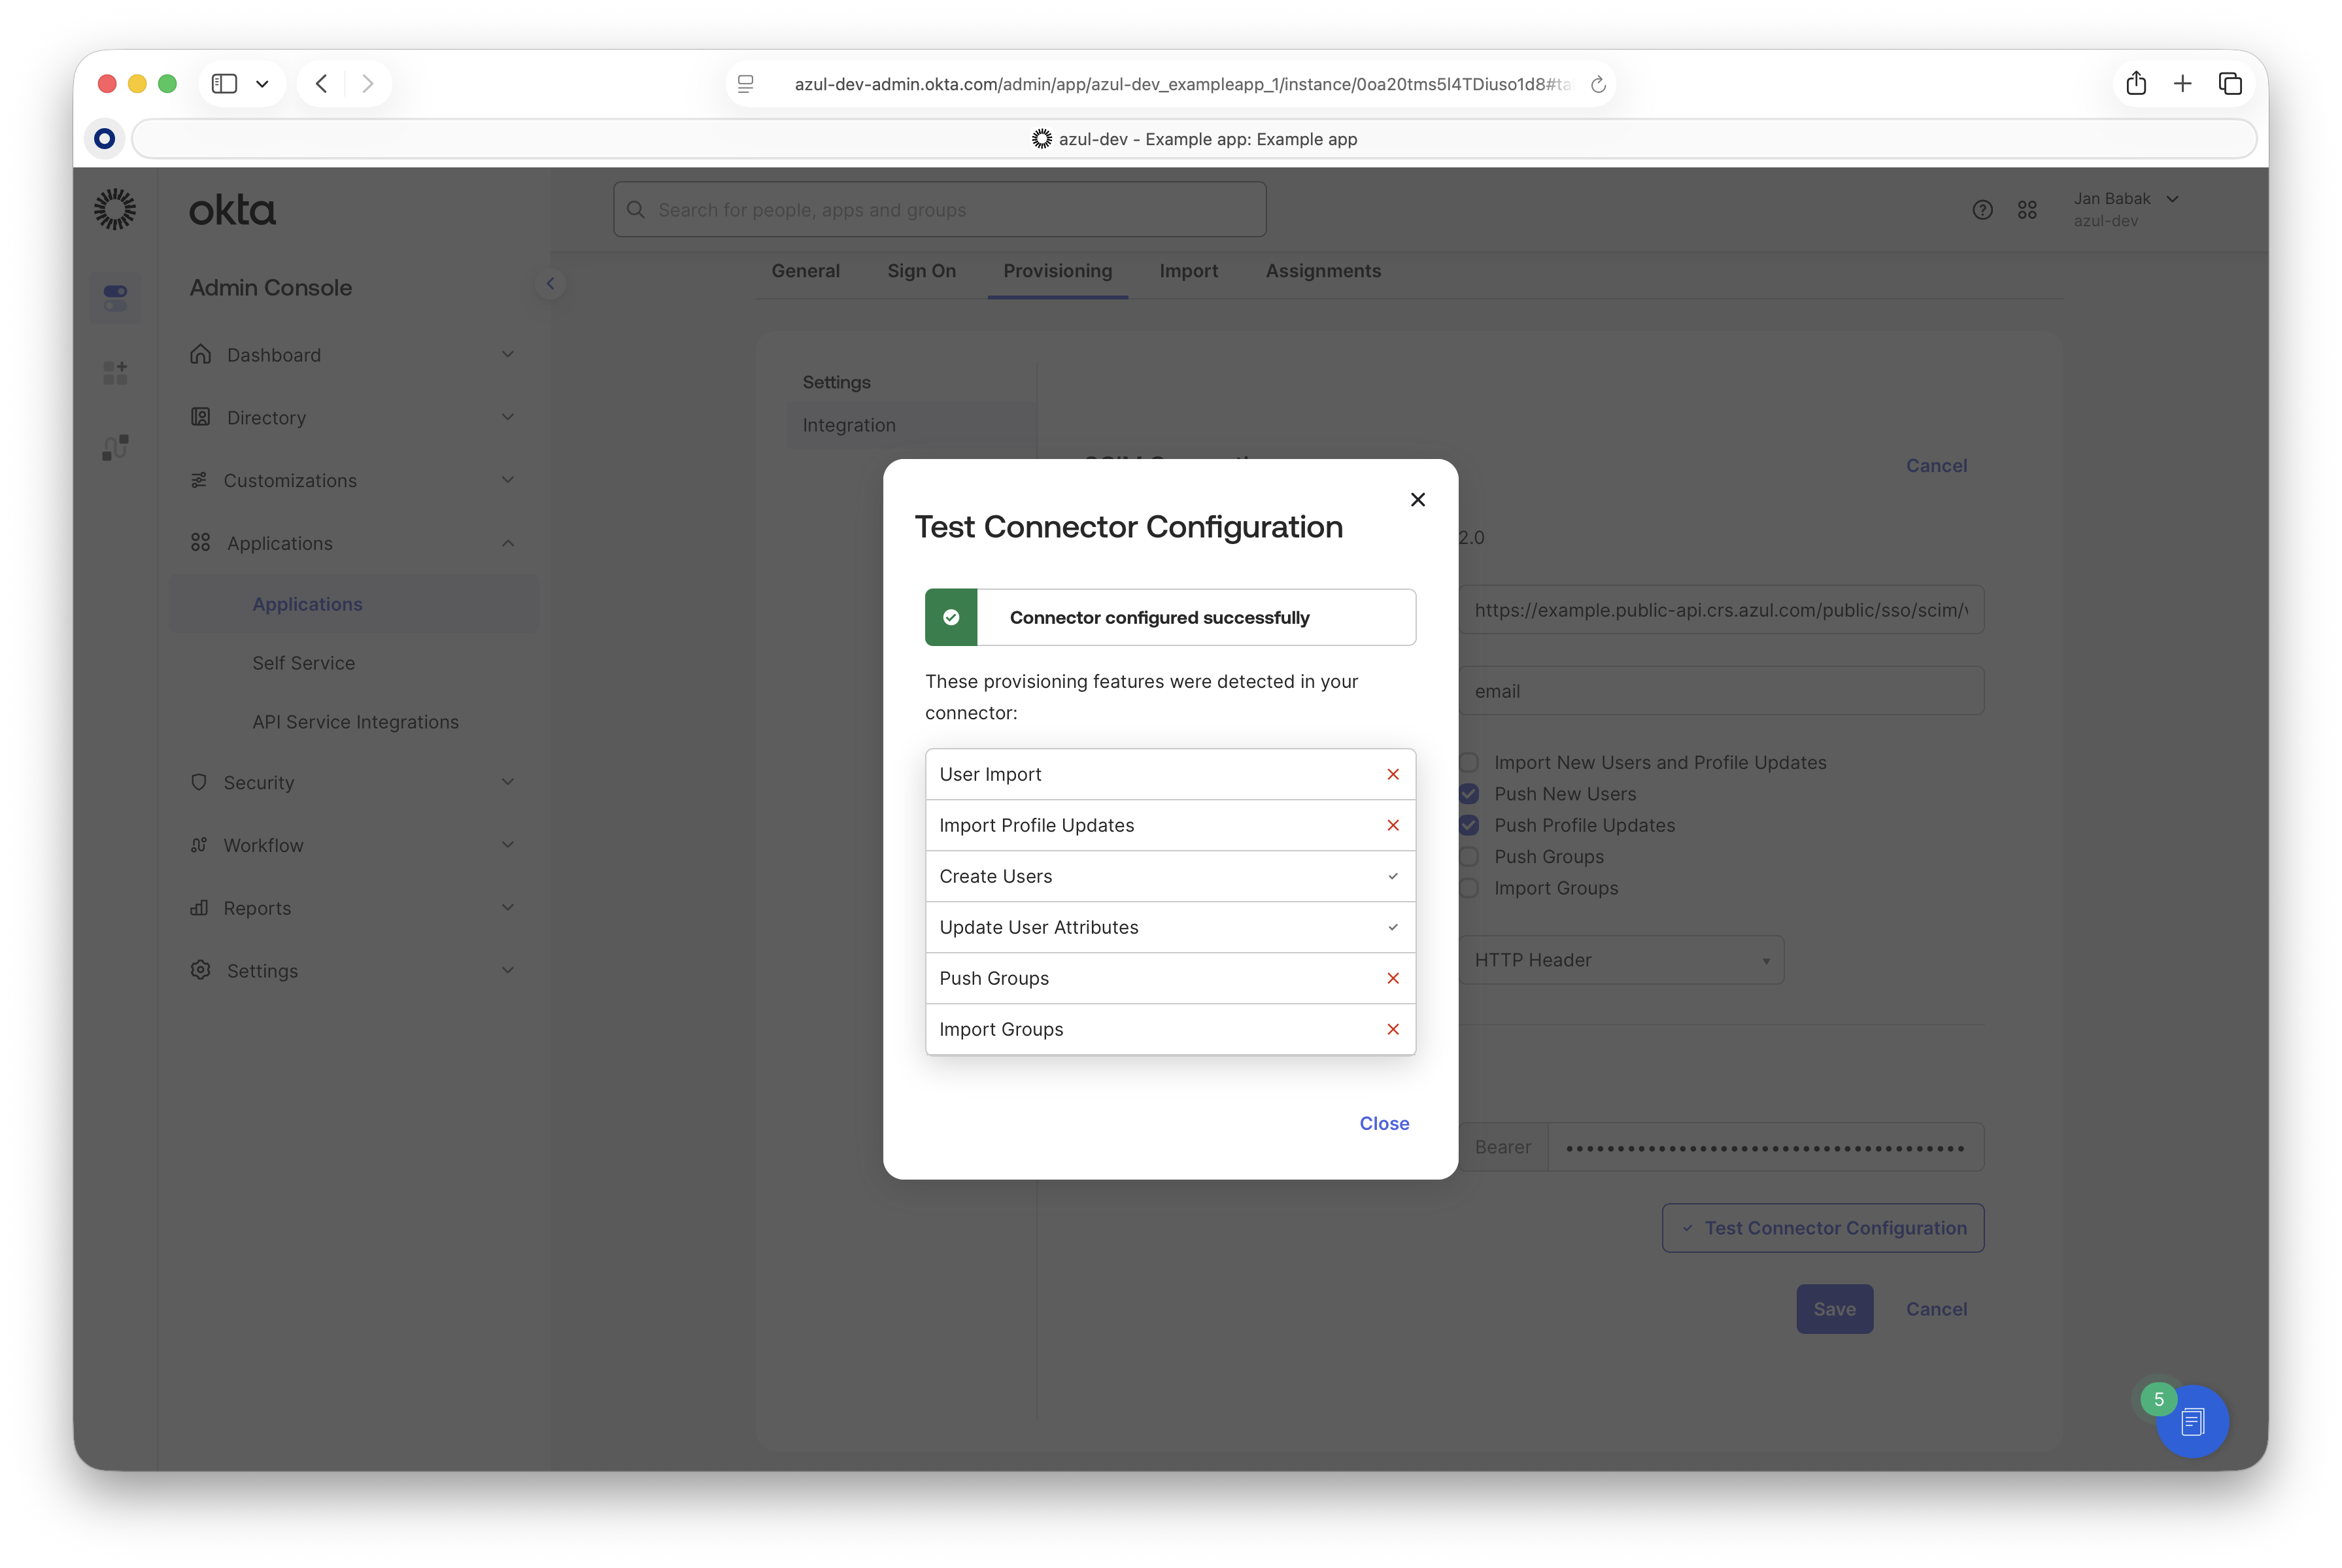
Enable "Push New Users" and "Push Profile Updates".
-
Set "Authentication Mode" to "HTTP Header" and enter the token. The token can be regenerated in our UI under "SSO Integration" settings.

-
-
Click "Test Connector Configuration". A successful test confirms the configuration.
-
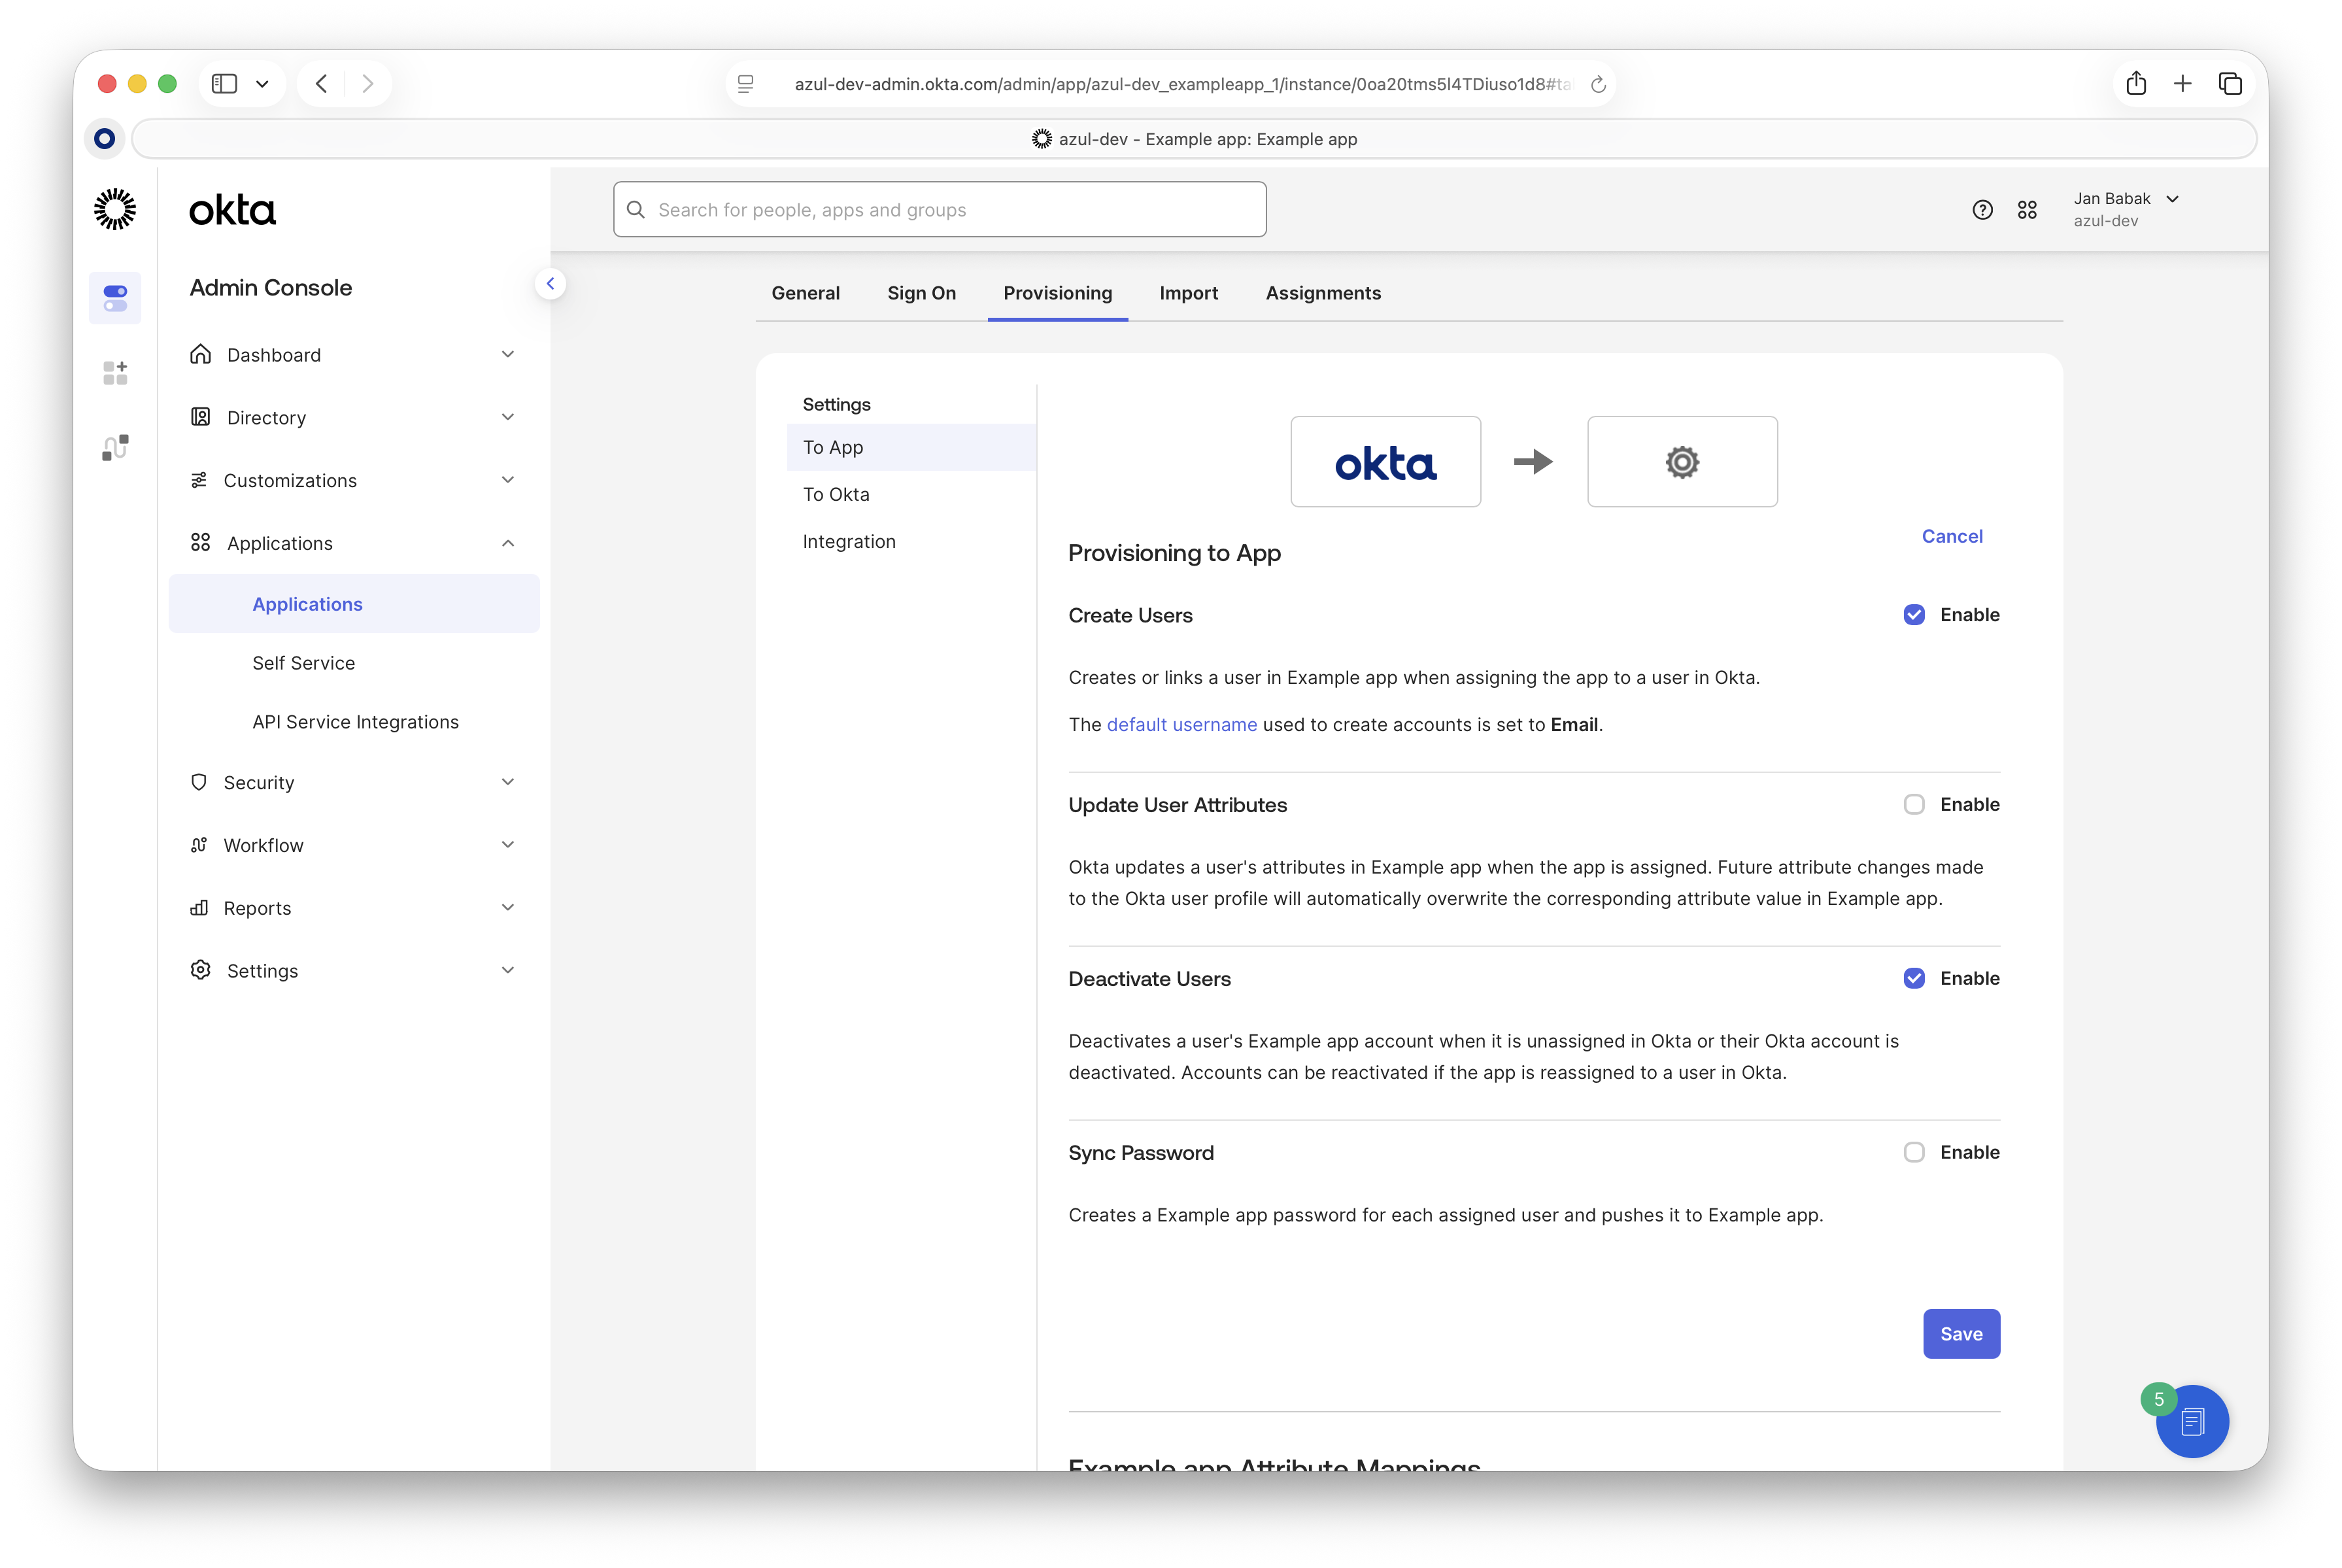
On the "To App" page, enable "Create Users" and "Deactivate Users".
-
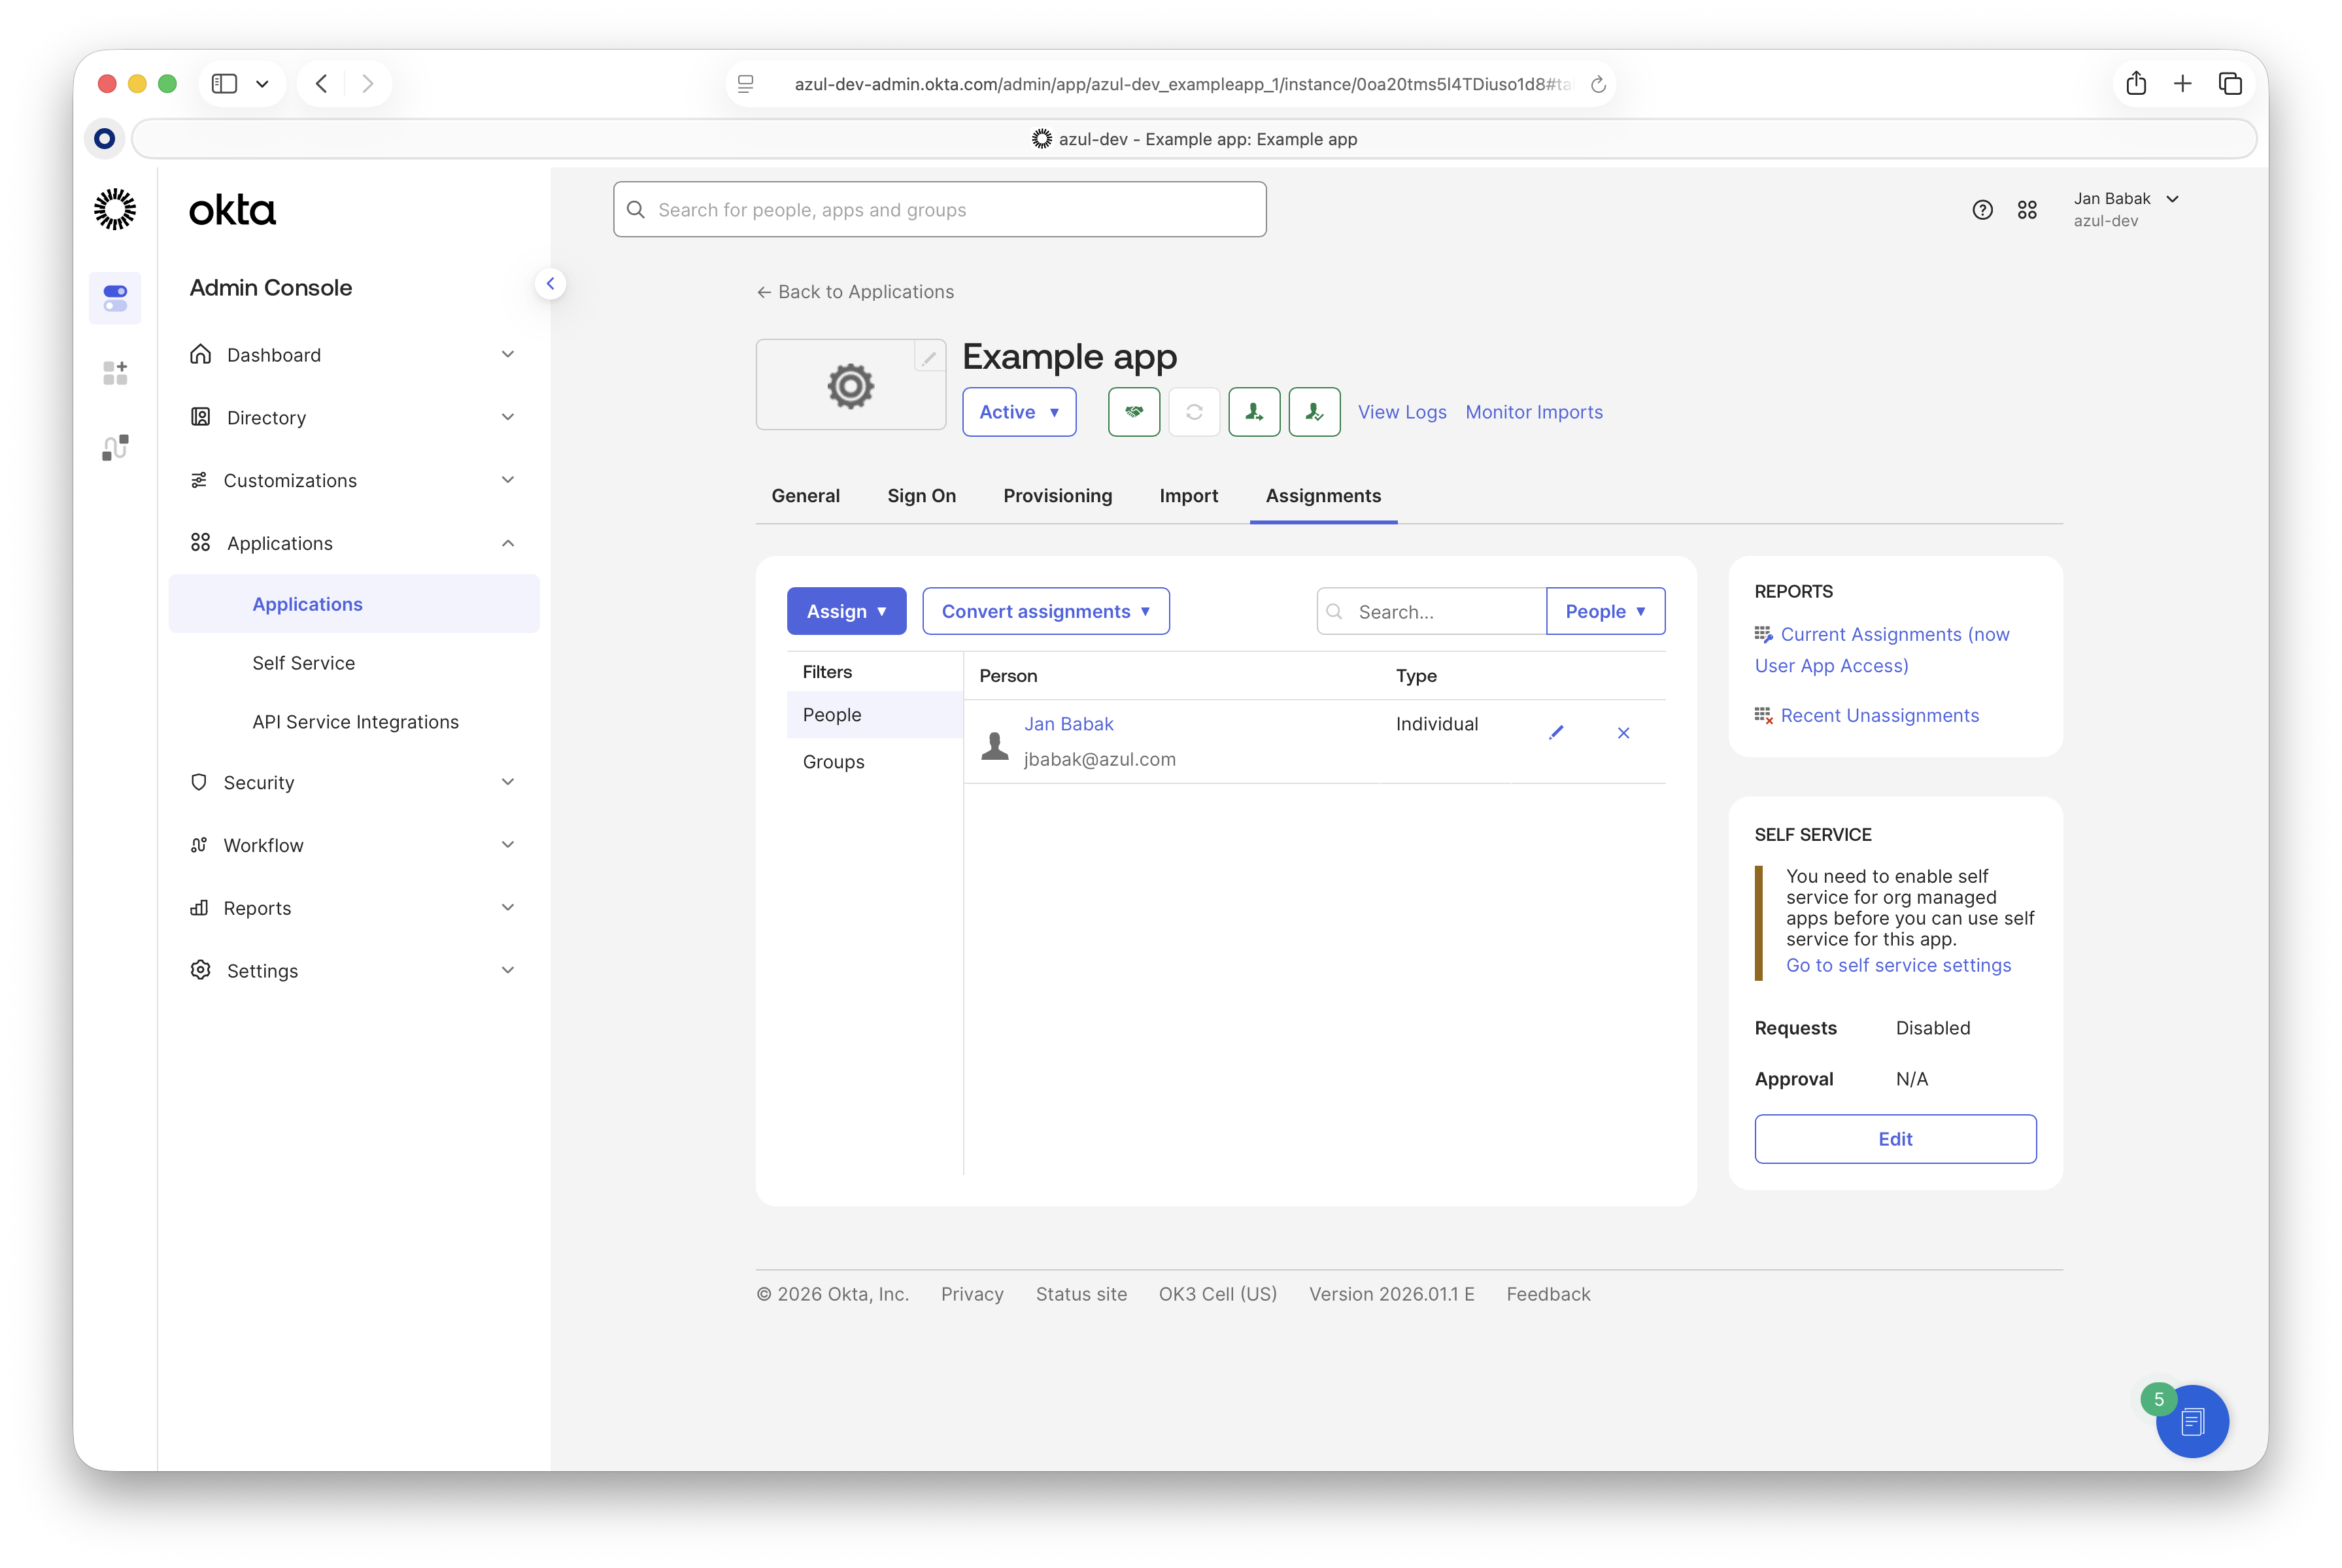
Finally, assign users to the application in Okta.
Troubleshooting
Some common errors you may encounter during the setup or use of SSO:
-
Invalid SAML response received. PreSignUp failed with error Email is required for signup…This happens if your attributes mapping is not correct. It is necessary to map the
emailandnameSAML attributes. -
SCIM API propagation is not working.
If you disable and reenable SSO, the SCIM authentication token changes. You need to update it in Okta.