Setting Up Your Development Environment
Azul Prime runs natively on the Linux operating system. If you are using a supported Linux distribution, your setup is trivial: install the latest Azul Zing Build of OpenJDK (Zing), integrate with your IDE or editor, and setup is complete. However, Prime is not natively available for Windows or macOS, so additional tools are required in these environments.
This article describes how developers can set up an environment to use Azul Core and Azul Prime to develop applications on Windows or macOS. Using this article as a guide, you can use a non-Linux system to develop and test your application before deploying on a production Linux host or container. The described environment is not the only option but is offered as an effective and productive solution. This solution is described for macOS but can be adapted for Windows as well.
Installing the Development JDK
The easiest way to get started is to use Azul Core as your primary development JDK. Zulu builds are drop-in replacements of Oracles Java SE and can be installed and configured in the same way.
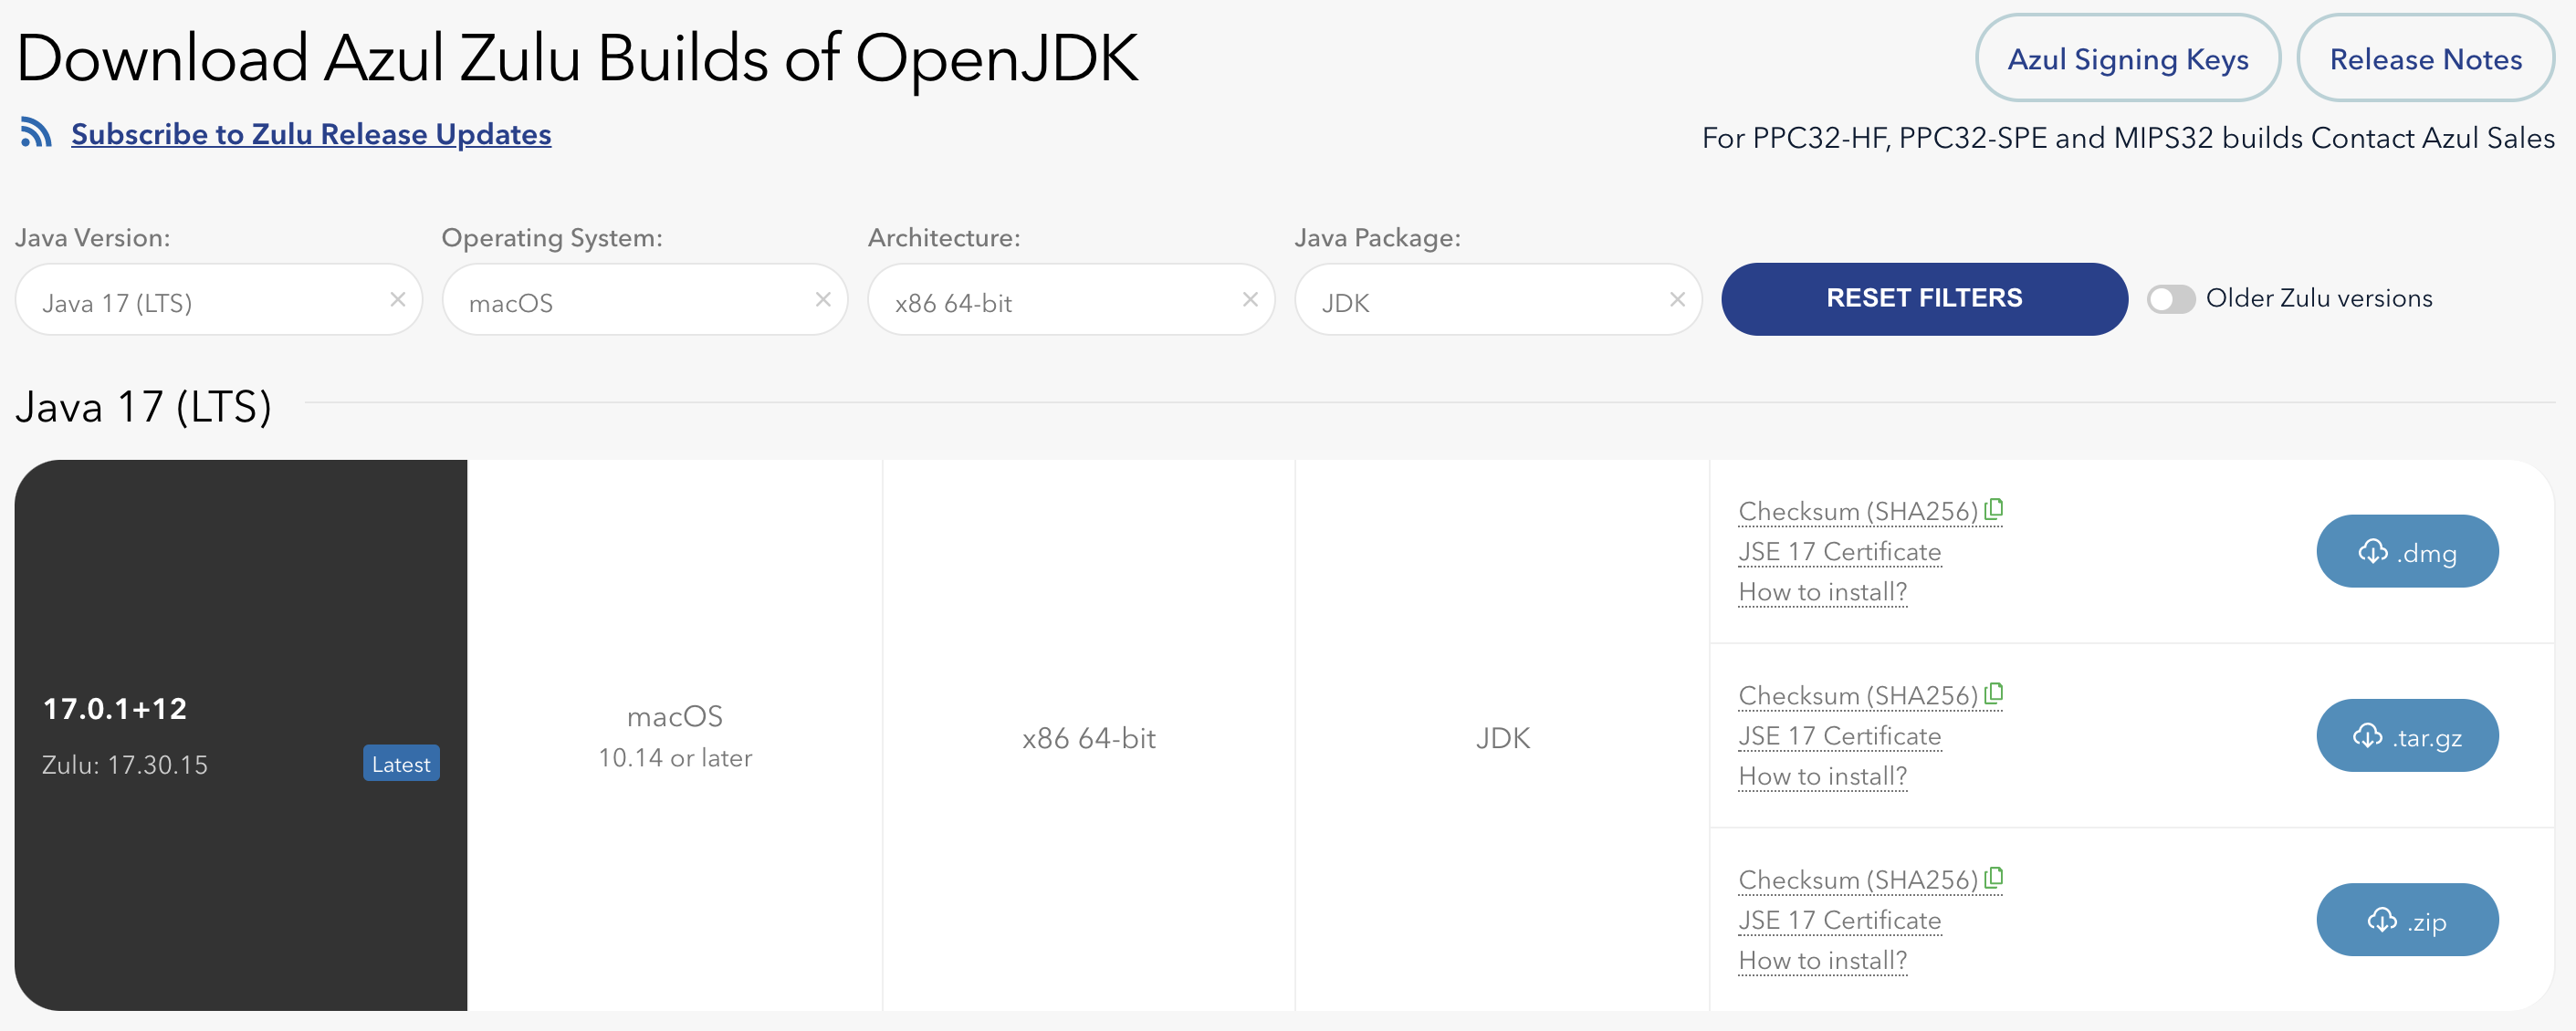
Use the download filters to choose a specific JDK and OS. The image below shows the download screen and some of the filters available.
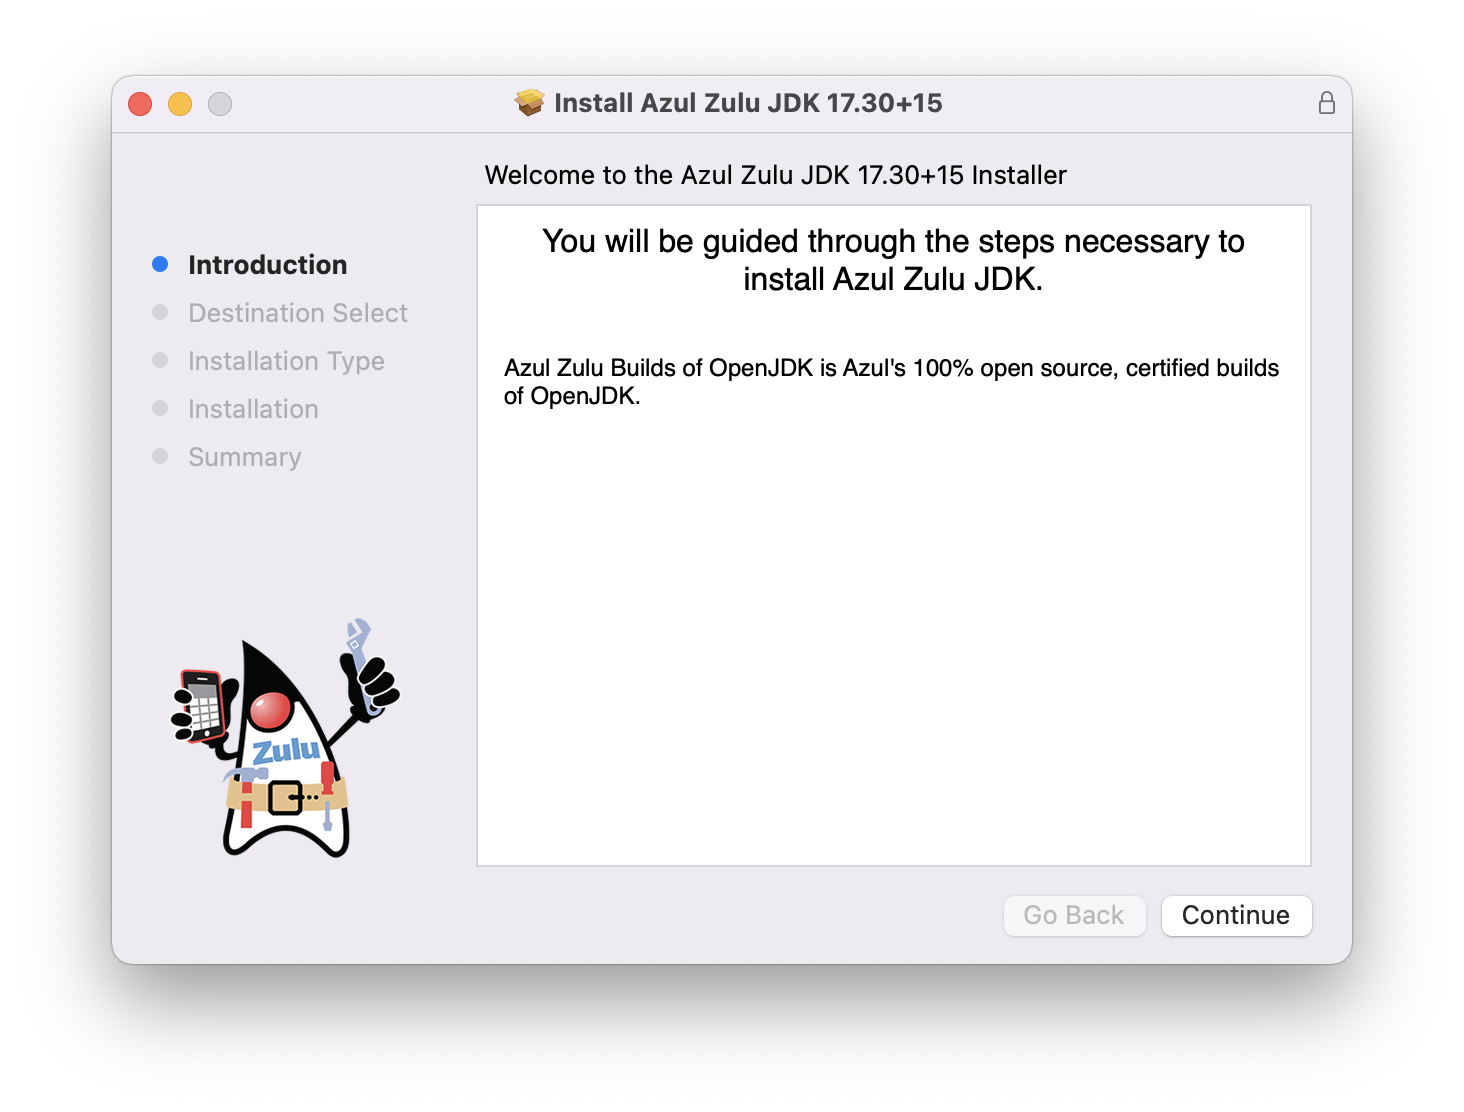
Once you’ve found an OpenJDK version, download an installation package. For macOS, you can choose either a DMG, tar.gz, or zip package format. The easiest package for macOS may be the DMG format. Select the DMG package. Once you’ve downloaded it, install it by double-clicking the DMG file.
For the command line and other tools, you will also want to put the JDK installation binaries on your shell search path. Add the following to your shell startup file. On most macOS systems, this will be the ~/.zshrc or similar file. Your JAVA_HOME and PATH environment should look similar to this:
 export JAVA_HOME=/Library/Java/JavaVirtualMachines/zulu-17.jdk/Contents/Home
export PATH=$JAVA_HOME/bin:$PATH
After installation, you should be able to run the OpenJDK tools from the command line:
 % java -version
openjdk version "17.0.1" 2021-10-19 LTS
OpenJDK Runtime Environment Zulu17.30+15-CA (build 17.0.1+12-LTS)
OpenJDK 64-Bit Server VM Zulu17.30+15-CA (build 17.0.1+12-LTS, mixed mode, sharing)

% javac --version
javac 17.0.1
Installing a Docker Image for Azul Prime
We will use Docker Desktop for macOS. Use Docker’s Getting Started guide to download and install Docker for your host.
Azul Prime’s Java compiler is not different from the Azul Core compiler. Therefore, you will see no benefit from compiling with the Prime compiler. Using the Core compiler will be sufficient. However, Azul Prime runtime does offers significant runtime enhancements that are not available in Core. For this reason, you may want to test your software on the Prime runtime instead of the Core runtime. This provides the added security and assurance of knowing that you have tested and even executed your application on your local system with the same runtime used in production.
In a macOS or Windows development environment, you can run Prime within a Docker container to perform local unit tests and even integration tests. You can also connect to a running, local Docker container for debugging purposes.
Retrieve a Prime Docker image from Docker Hub. From your shell, download an image for your preferred Linux distribution. In this instance, we will choose the azul/prime-ubuntu image.
docker pull azul/prime-ubuntu
Use the following command to see your pulled images from Azul:
 % docker images --filter=reference='azul/*:latest'
REPOSITORY          TAG       IMAGE ID       CREATED        SIZE
azul/prime-centos   latest    c6e583988f53   45 hours ago   846MB
azul/prime-ubuntu   latest    c8f64364f376   45 hours ago   597MB
azul/prime          latest    c8f64364f376   45 hours ago   597MB
Test your image now before going further. The Prime image for Ubuntu should be executable with the following command:
% docker run --rm azul/prime-ubuntu java -version
The above command should produce something like the following in your terminal:
 java version "17.0.5" 2022-10-27 LTS
Java Runtime Environment Zing22.10.0.0+3 (build 17.0.5+8-LTS)
Zing 64-Bit Tiered VM Zing22.10.0.0+3 (build 17.0.5-zing_22.10.0.0-b3-product-linux-aarch64, mixed mode)
Integrating OpenJDK with IntelliJ IDEA
You can integrate the Zulu JDK with most source code editors, Integrated Development Environments (IDE), Maven, Gradle, ANT and other common development tools.
In this article, we’ve used the IntelliJ IDEA Community Edition. Use IntelliJ IDEA’s installation guide to install the IDE.
To add Zulu OpenJDK 17 to your project, perform the following steps:
-
Open IntelliJ IDEA Community Edition.
-
Select File > Project Structure for New Projects > Platform Settings >SDKs. Press Command-N or the
+symbol to add a new SDK.
-
Since you’ve already installed Azul Zulu, IntelliJ IDEA may have detected it on your command path. If it has, select a 'Detected JDK'. Otherwise, select 'Add JDK…' and choose the folder containing your installed JDK. On macOS, the folder most likely begins with
/Library/Java/JavaVirtualMachines/. -
Select
Apply, then selectOKfrom the same window.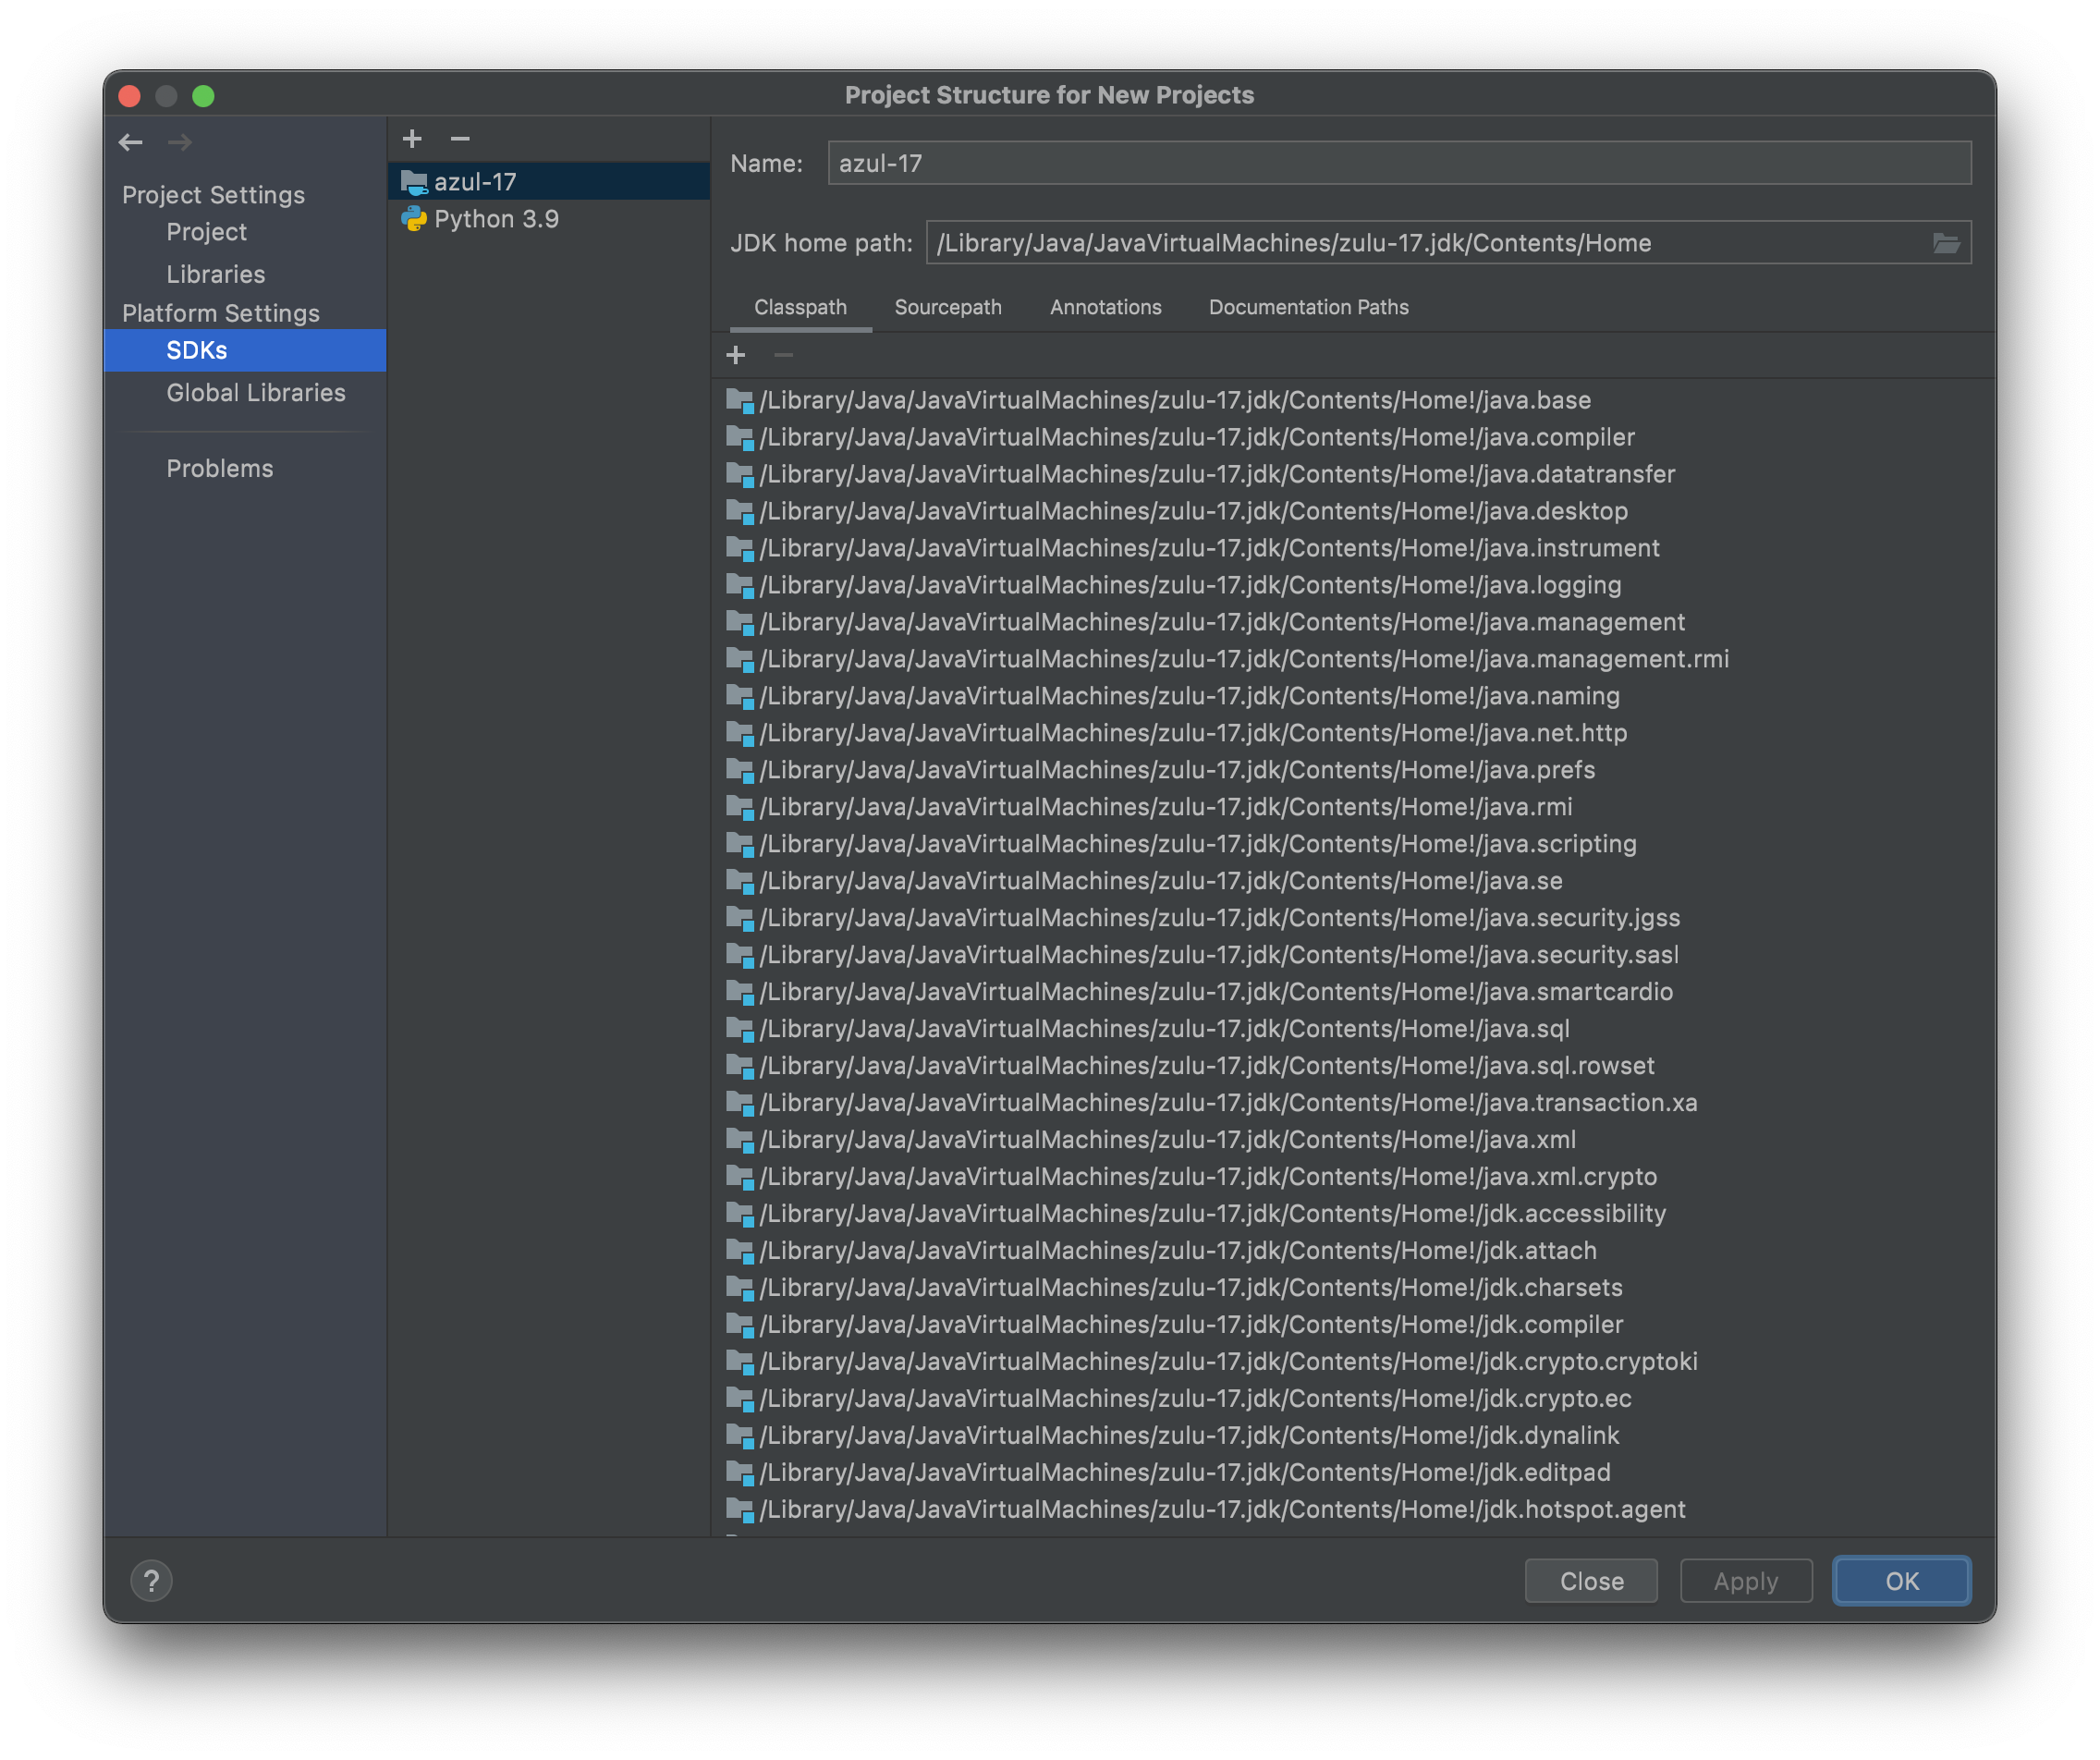
Zulu OpenJDK is now integrated with IntelliJ IDEA and is available to use in your Java projects.
Integrating Docker
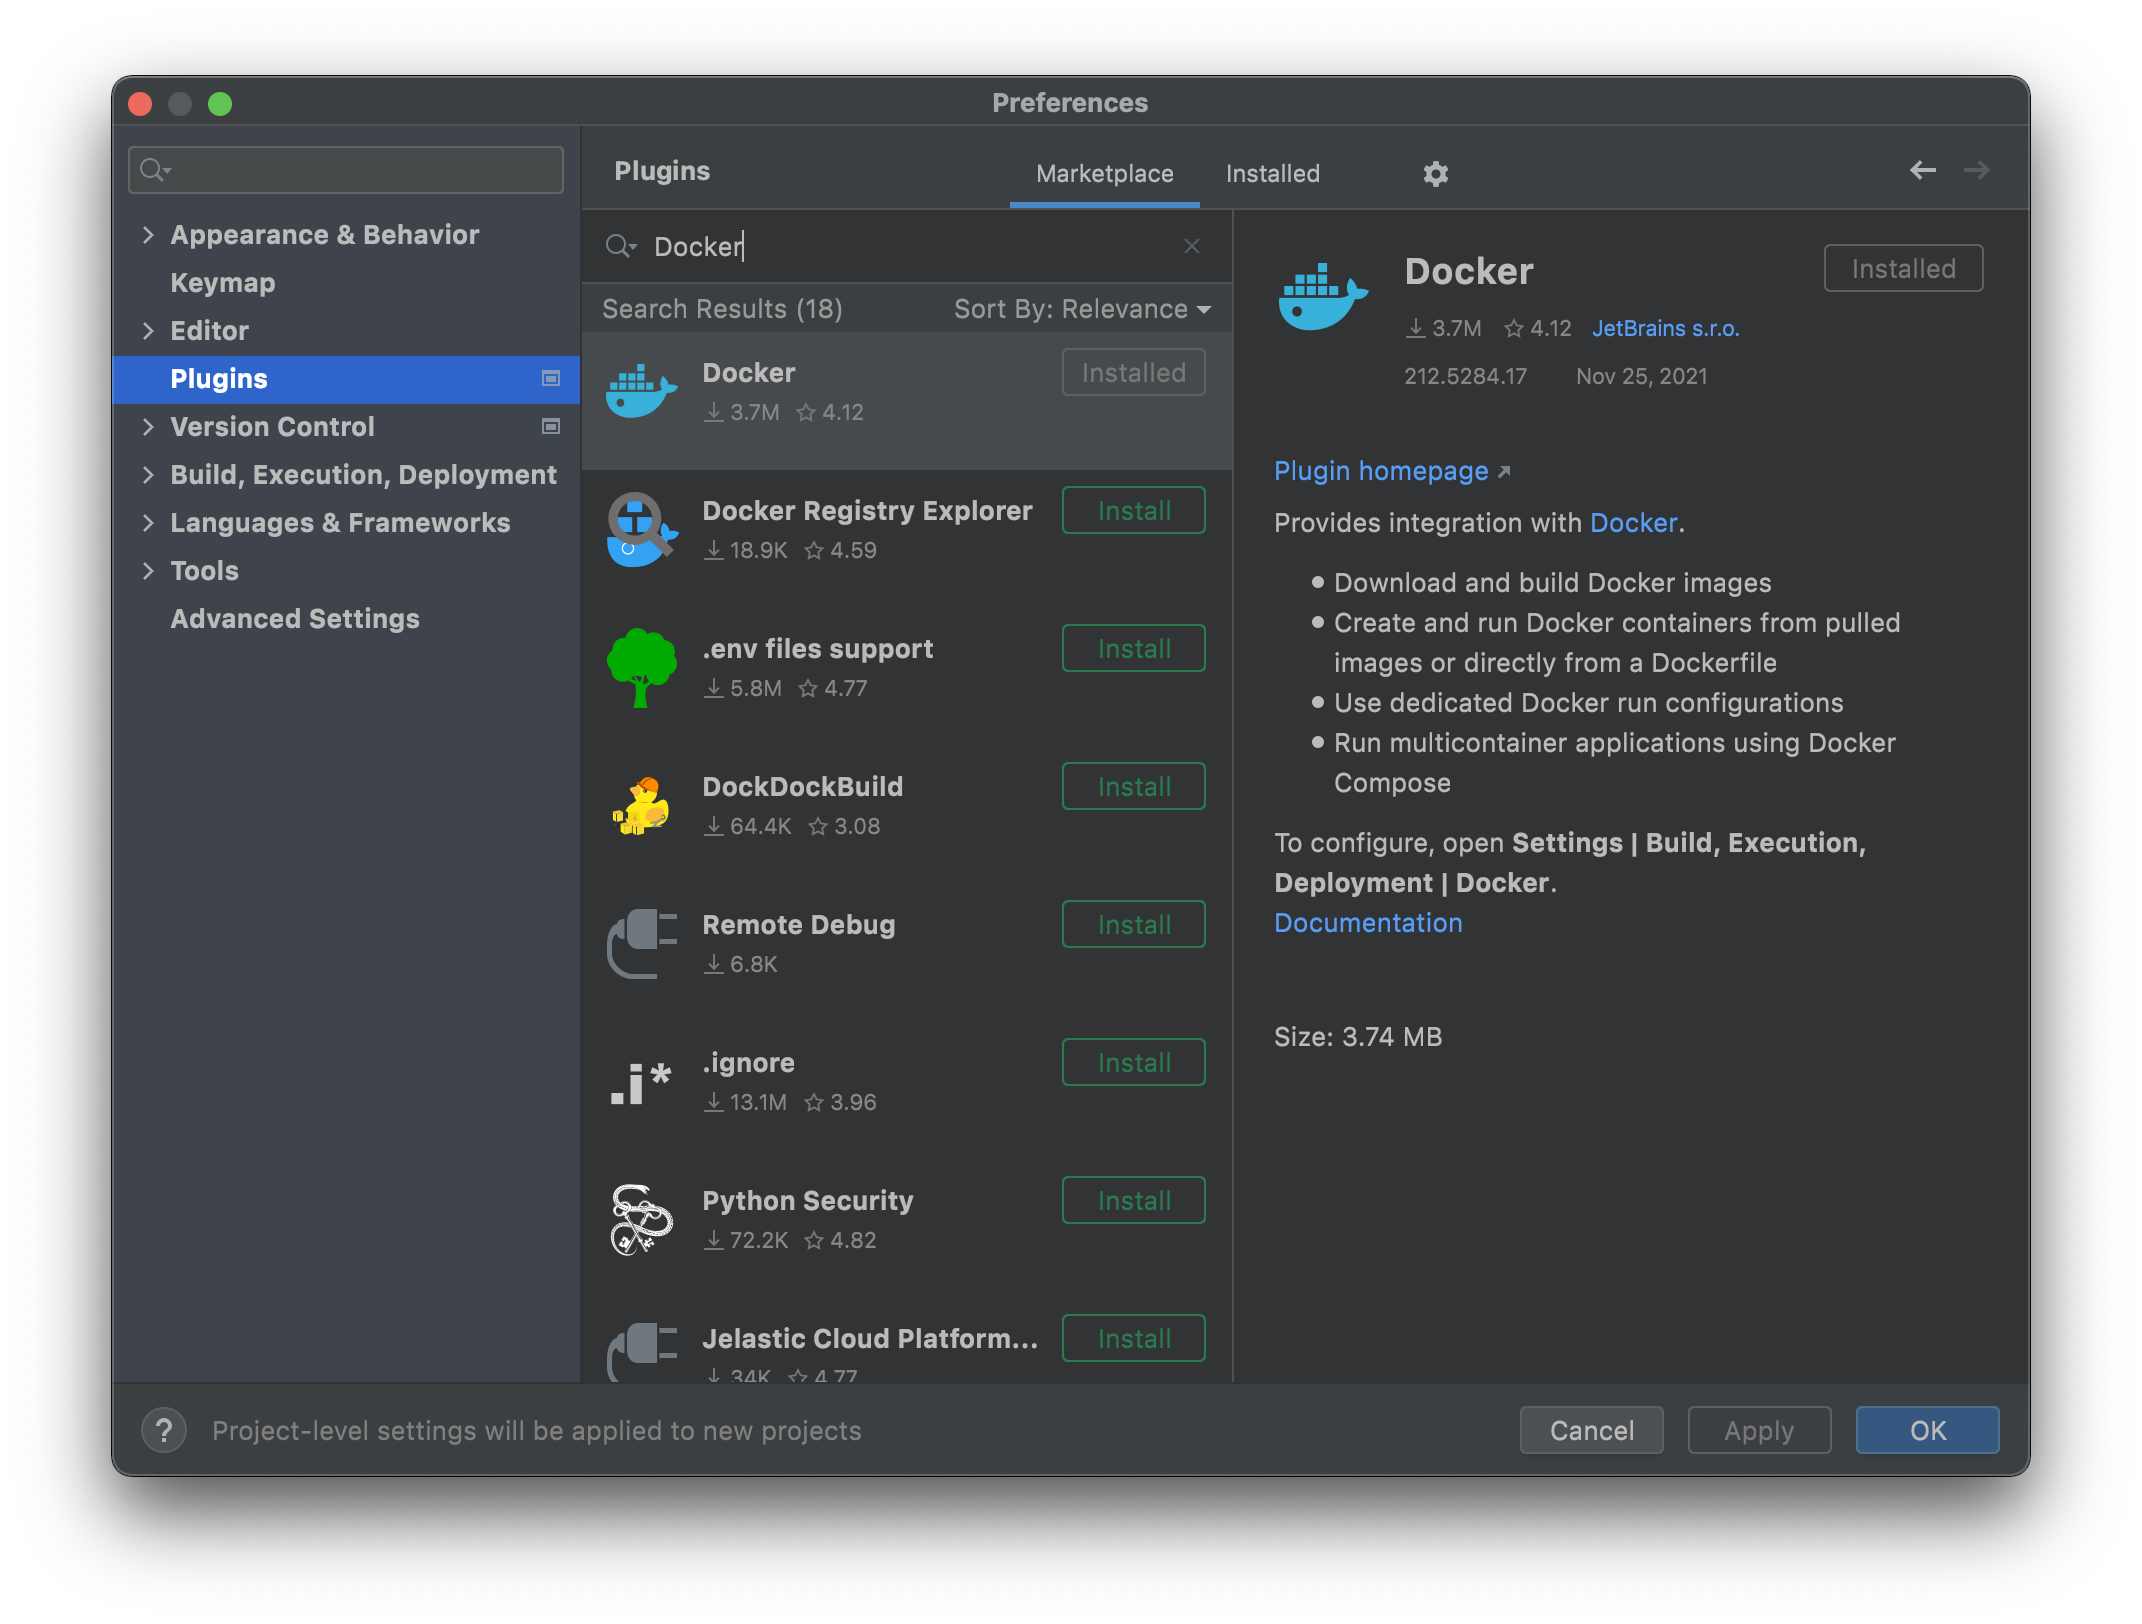
IntelliJ IDEA has a plugin for Docker support, which makes Docker easier to use from with its IDE. From within IntelliJ IDEA, choose Preferences→Plugins. From there, select the Marketplace tab. Type "Docker" into the search bar. Select the Docker plugin provided by IntelliJ IDEA and select the Install button. For more detailed installation help, follow IntelliJ IDEA’s Integration Guide for Docker.
Running the Application
Once you’ve integrated the Docker tools, you are ready to set up your application. We have chosen the Spring Boot Pet Clinic application to demonstrate full integration with our development toolchain. Use the following on your command line to download the Pet Clinic source code:
git clone https://github.com/dockersamples/spring-petclinic-docker.git
This version of Pet Clinic has a runnable Dockerfile in the root directory.
From within IntelliJ IDEA, simply select Open on the downloaded project directory. IntelliJ IDEA will recognize the maven project.
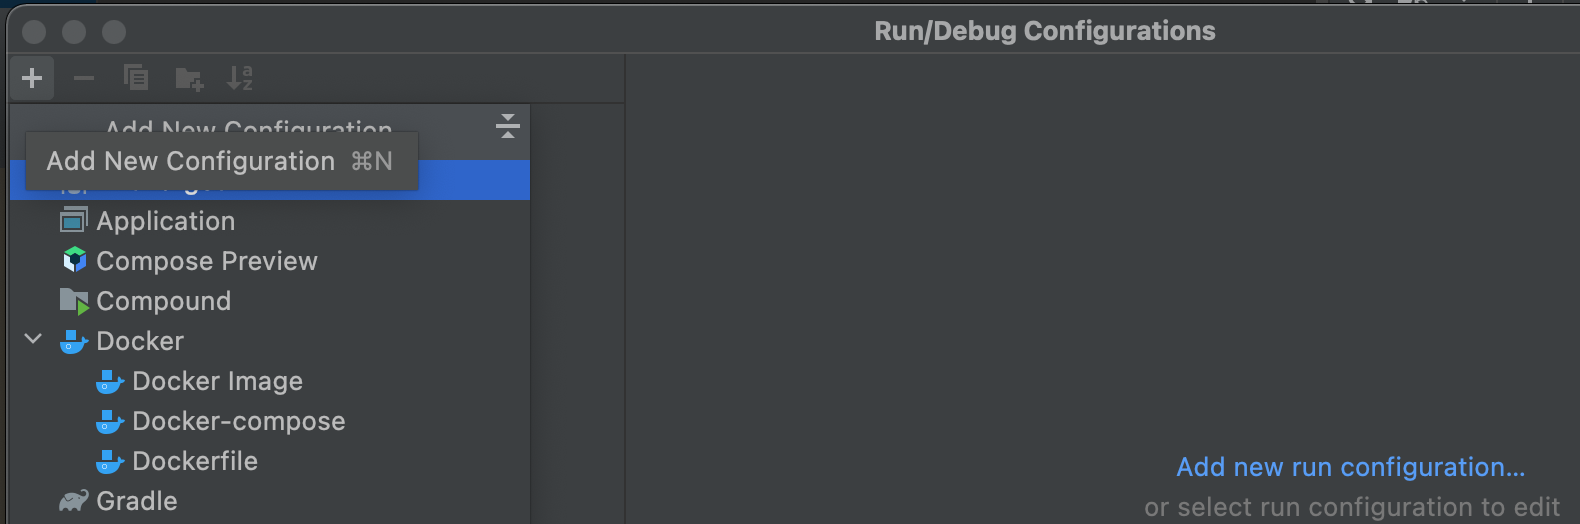
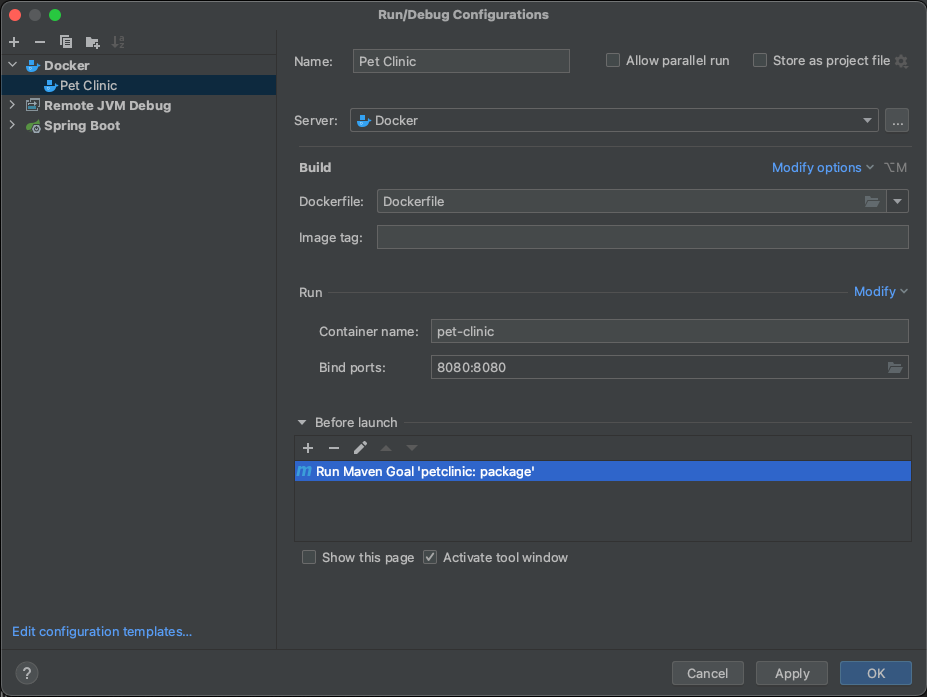
Select Run > Edit Configurations. Select the + symbol to add a new Dockerfile run configuration. Choose the Dockerfile option for a new run configuration.
-
Name the configuration "Pet Clinic".
-
Select the
Dockerfilefile in the root of the application to build. -
Use
pet-clinicas the "Container name", so we can easily identify this application in the list of running Docker applications. -
Because the running Docker container will use port 8080, you must also export this port. Select Modify→ Bind Ports to map port 8080 on the host to port 8080 within the container.
-
Build the project before starting the Docker, by adding a "Run Maven Goal" in the "Before lauch setting", with the command line
package. -
Finally, select
Applyand thenOKto create the run configuration.
Our Dockerfile is quite simple. We simply use the azul/prime-ubuntu image, copy the jar, and run the application into the updated image:
 FROM azul/prime-ubuntu

WORKDIR /app
COPY target/spring-petclinic-2.7.0-SNAPSHOT.jar petclinic.jar
CMD ["java", "-jar", "petclinic.jar"]
|
Note
|
depending on the sources of the Petclinic example you downloaded, you may need to modify the filename of target/spring-petclinic-2.7.0-SNAPSHOT.jar.
|
You can test that the run configuration works by selecting Run > Run 'Pet Clinic` from the IntelliJ IDEA menu.

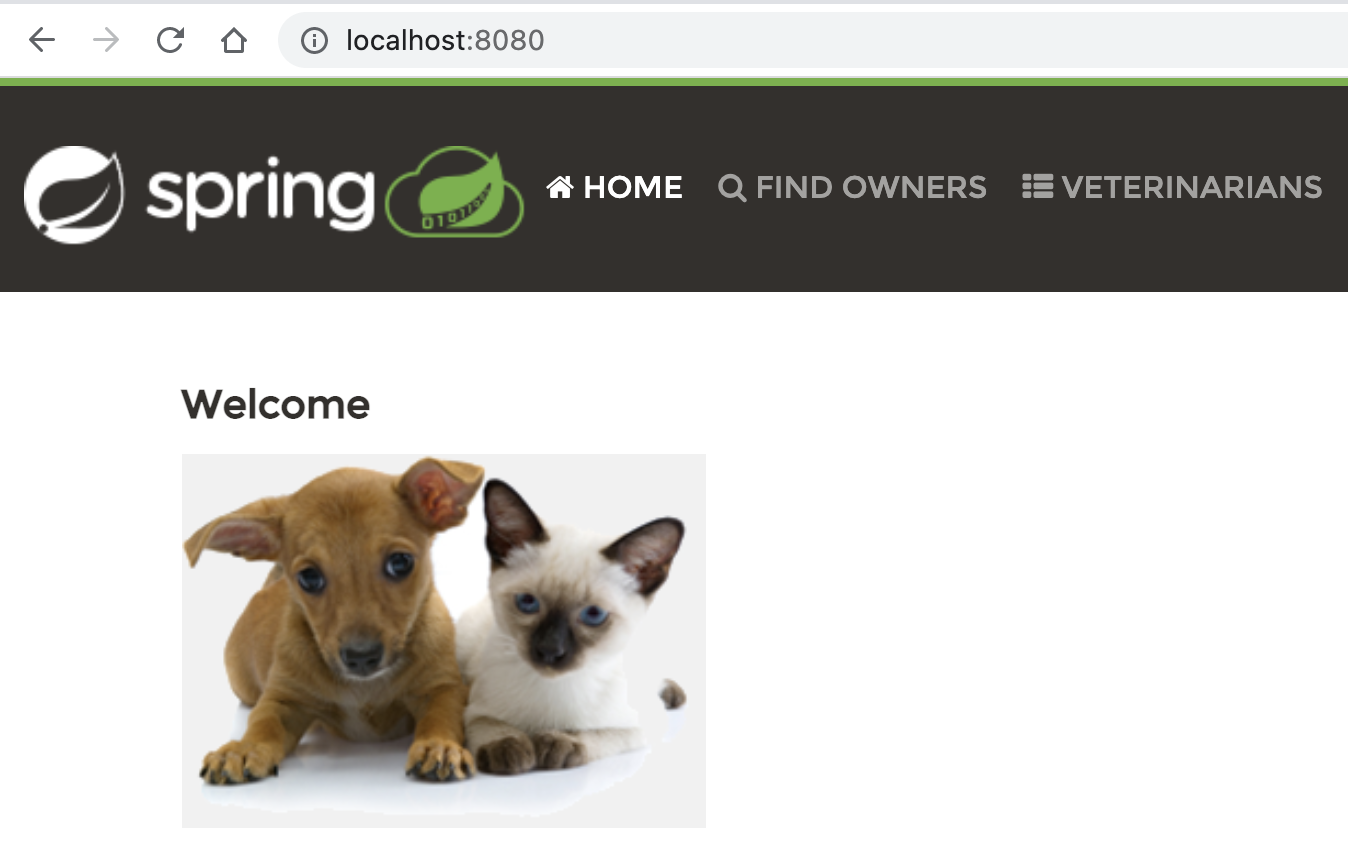
After giving the container and application a few seconds to initialize, you can access the demonstration application from a browser at localhost:8080.
With the docker ps command you can check the status of the Docker application.
 docker ps

CONTAINER ID   IMAGE          COMMAND                  CREATED         STATUS         PORTS                    NAMES
ee15e325a503   cda90d73e71e   "java -jar petclinic…"   5 seconds ago   Up 4 seconds   0.0.0.0:8080->8080/tcp   pet-clinic
You can validate the used Java version in the Docker image by executing a command inside the Docker with the interactive -it option:
 docker exec -it pet-clinic java -version

java version "17.0.5" 2022-10-27 LTS
Java Runtime Environment Zing22.10.0.0+3 (build 17.0.5+8-LTS)
Zing 64-Bit Tiered VM Zing22.10.0.0+3 (build 17.0.5-zing_22.10.0.0-b3-product-linux-aarch64, mixed mode)
Debugging the Application within the Docker Container
In addition to running your application in a Docker image, you will be able to debug the container as well. To do this, you will need to add a remote debugging configuration to the IDE.
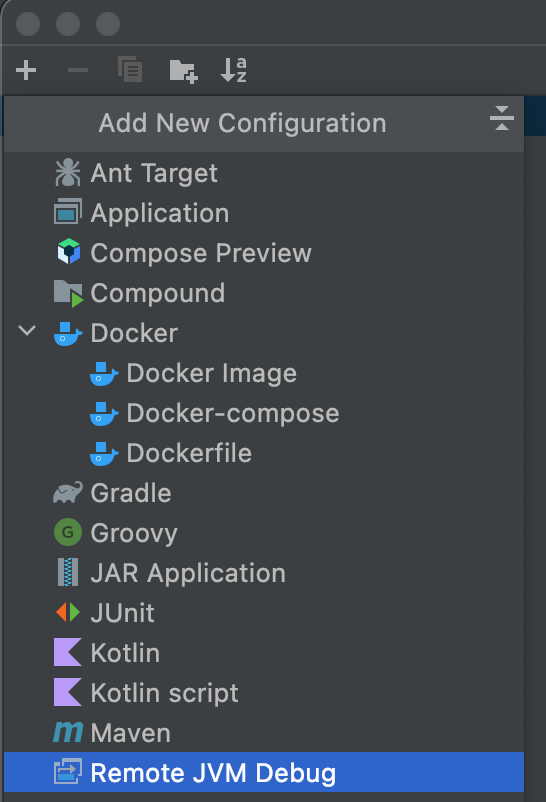
Select Run > Edit Configurations. Click the + symbol. Select Remote JVM Debug to add a debug configuration.
Give the configuration a name, Debug Spring Pet Clinic.
Also, we need to add a Before launch step. Add a new task to launch Docker before debugging.
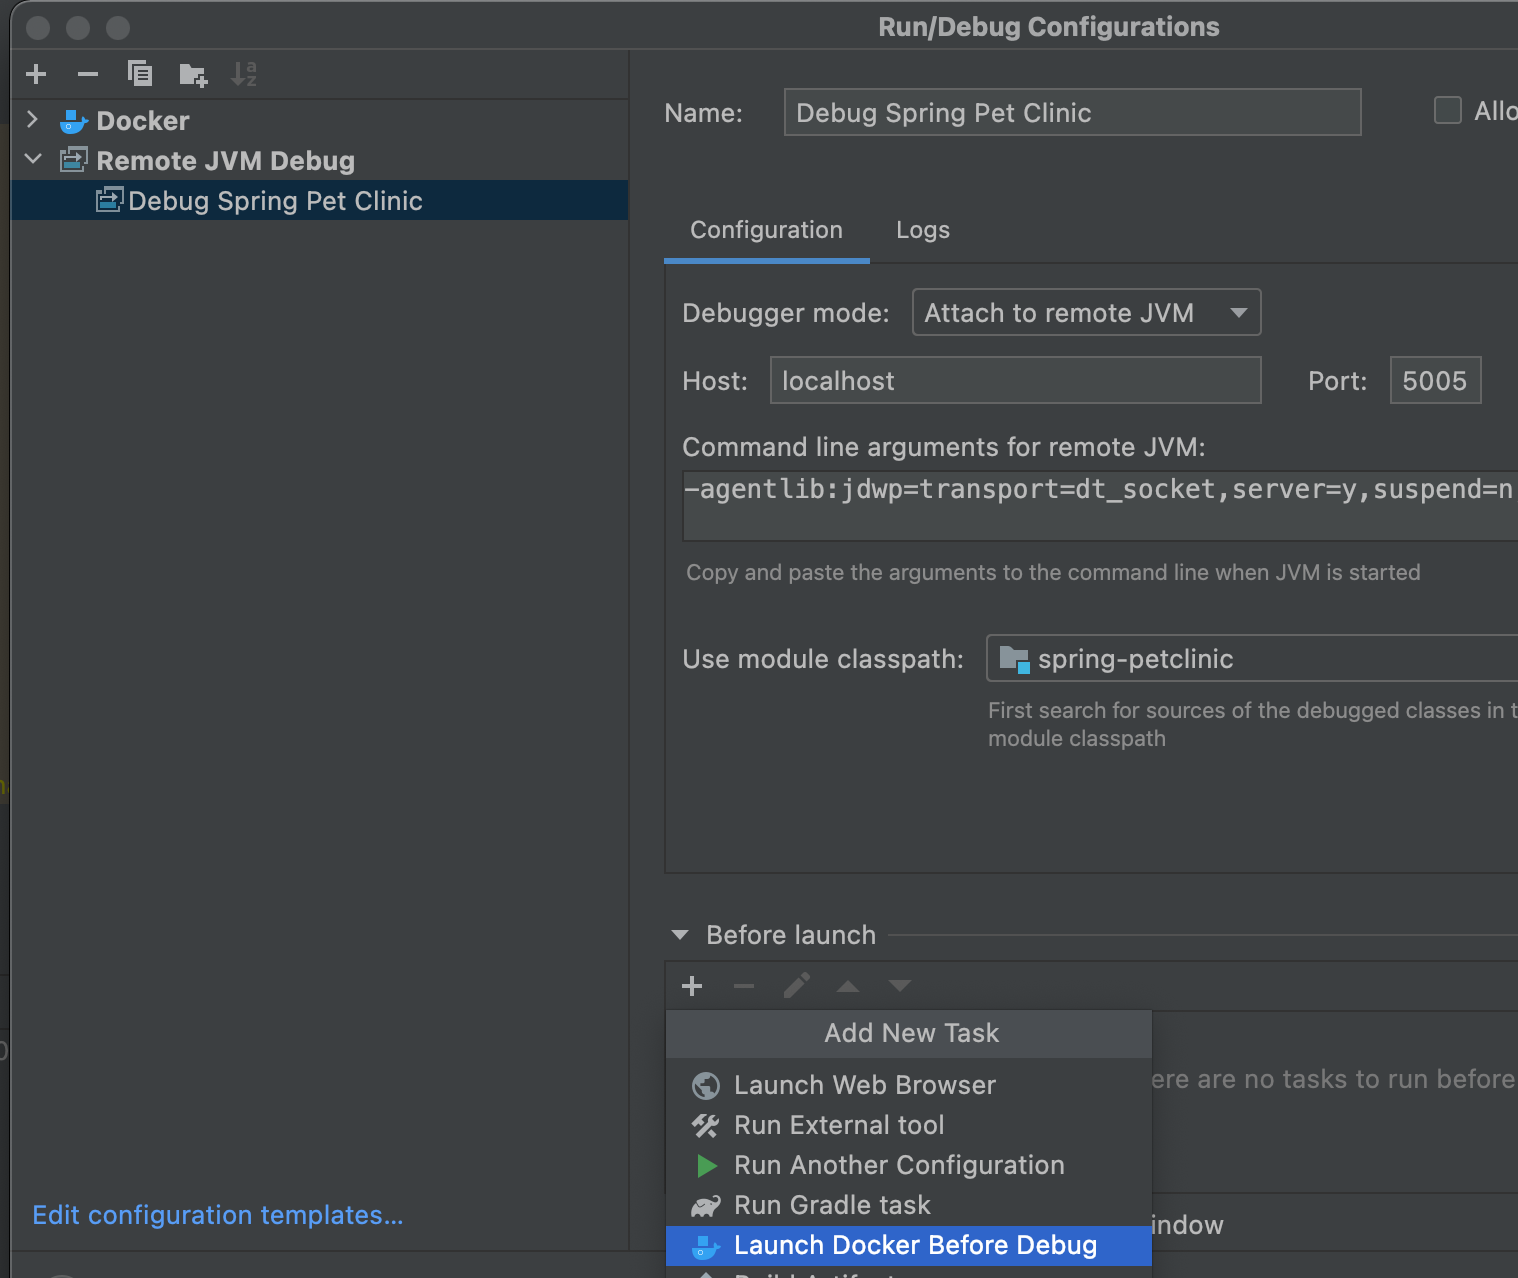
Add the following custom command to the Before launch step. This command starts the Docker container with options to enable remote debugging on port 5005 and exposes that port on the host.
java -agentlib:jdwp=transport=dt_socket,server=y,suspend=n,address=*:5005 -jar petclinic.jar
The Before launch step is shown below in IntelliJ IDEA:
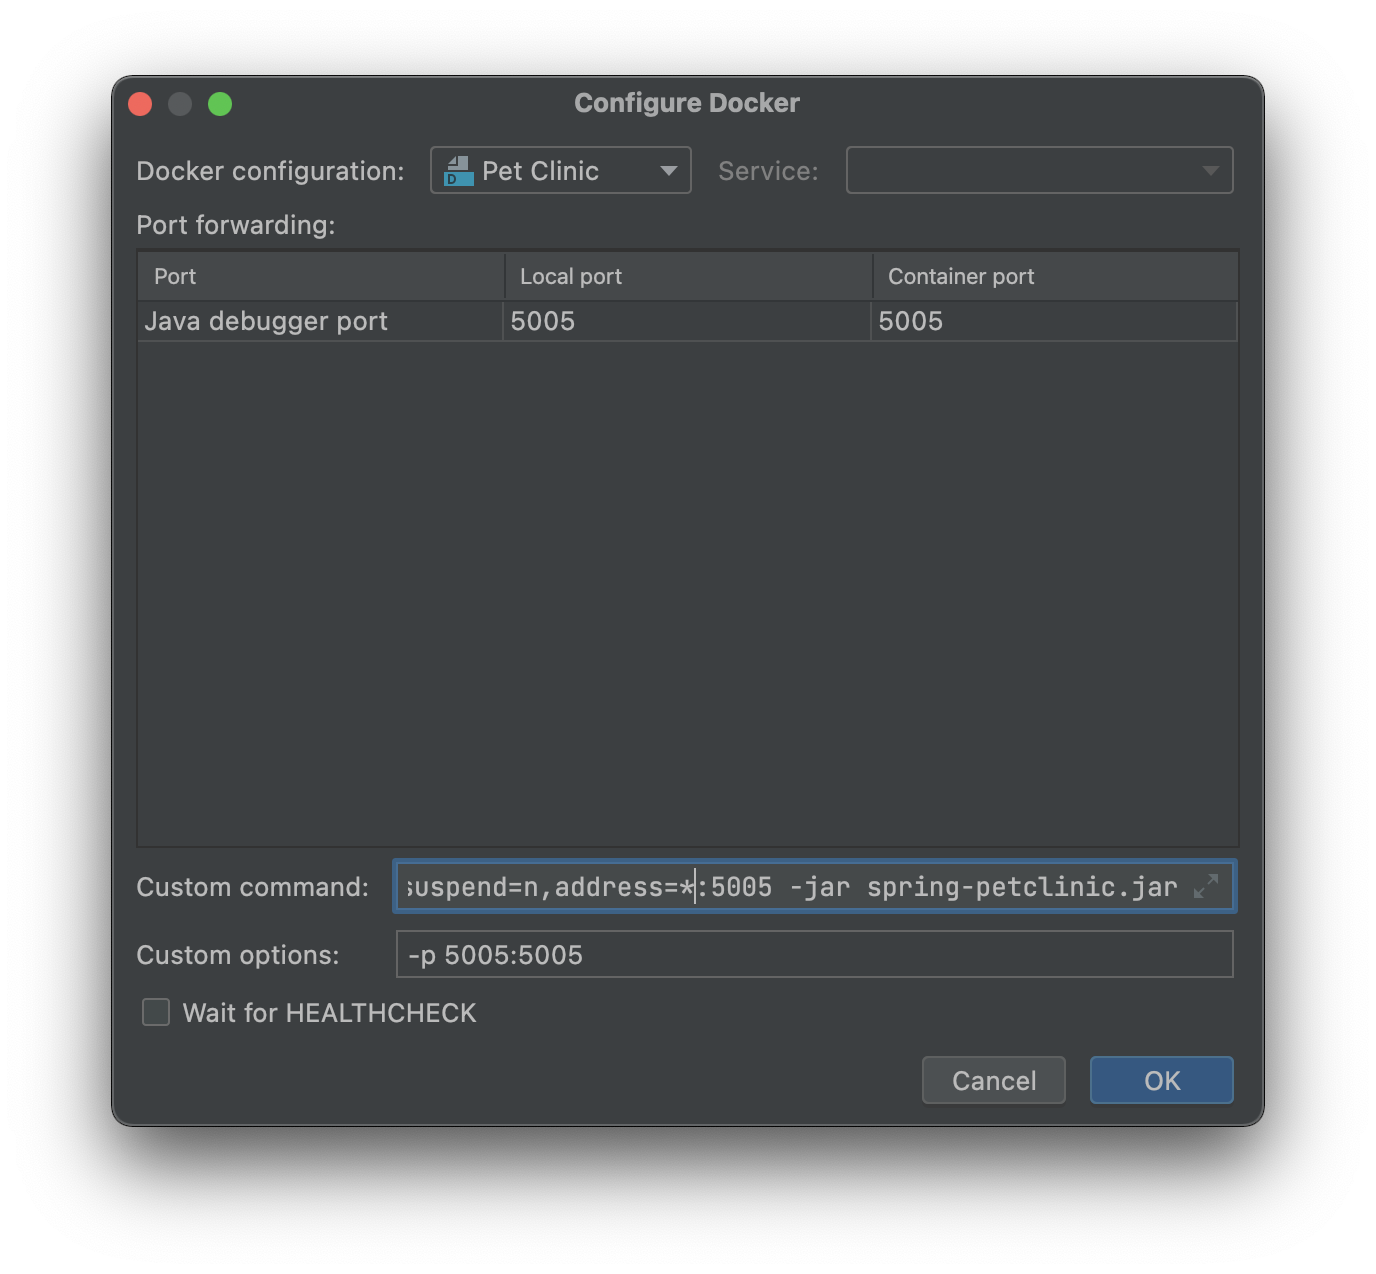
Click OK to close the Docker configuration dialog box.
Finally, select Apply and OK to close the new debug configuration.
To begin a debug session, select Run→Debug 'Debug Spring Pet Clinic' from the IntelliJ IDEA menu. This begins a remote JVM debug session after launching the container image we’ve defined earlier.
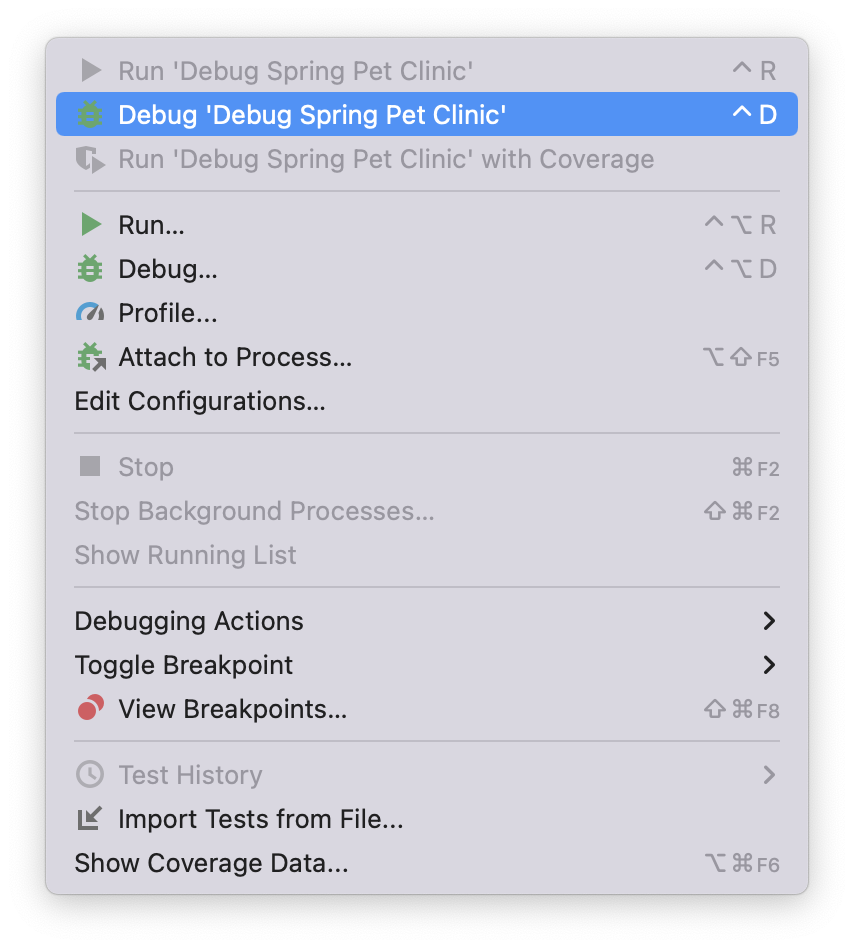
You can now set breakpoints in your application code as needed. Your application is running with Azul Prime’s optimized Java runtime within a debuggable Docker image.
Summary
Azul Prime is available in a Dockerized container image that can be integrated into your local development environment. Even if you use macOS or Windows as your host development platform, the Docker image allows you to run your application using the same Azul Prime runtime.