Building Payara Tools VS Code IDE Plugin
The Payara Tools VS Code IDE Extension source code is available in the VS Code Extension repository.
Prerequisites
Before building the Payara Tools VS Code extension, you will need to configure your local environment. Subsequent builds will not require these steps.
-
Clone the ecosystem-vscode-plugin repository: You must first clone the repository where the extension source code is stored. VS Code Extension repository
-
Install Yarn: Yarn is the build tool for the Payara Tools VS Code IDE Plugin and must be configured locally. Install Yarn
-
Install vsce: vsce is the tool to package VS Code extensions. Install vsce
Build Payara Tools
To build the Payara Tools VS Code extension, run the following commands from the root directory where the project was cloned:
-
yarn install -
yarn run tslint -
yarn run compile
To package the extension into a file which can be added to VS Code, run the following command:
-
vsce package
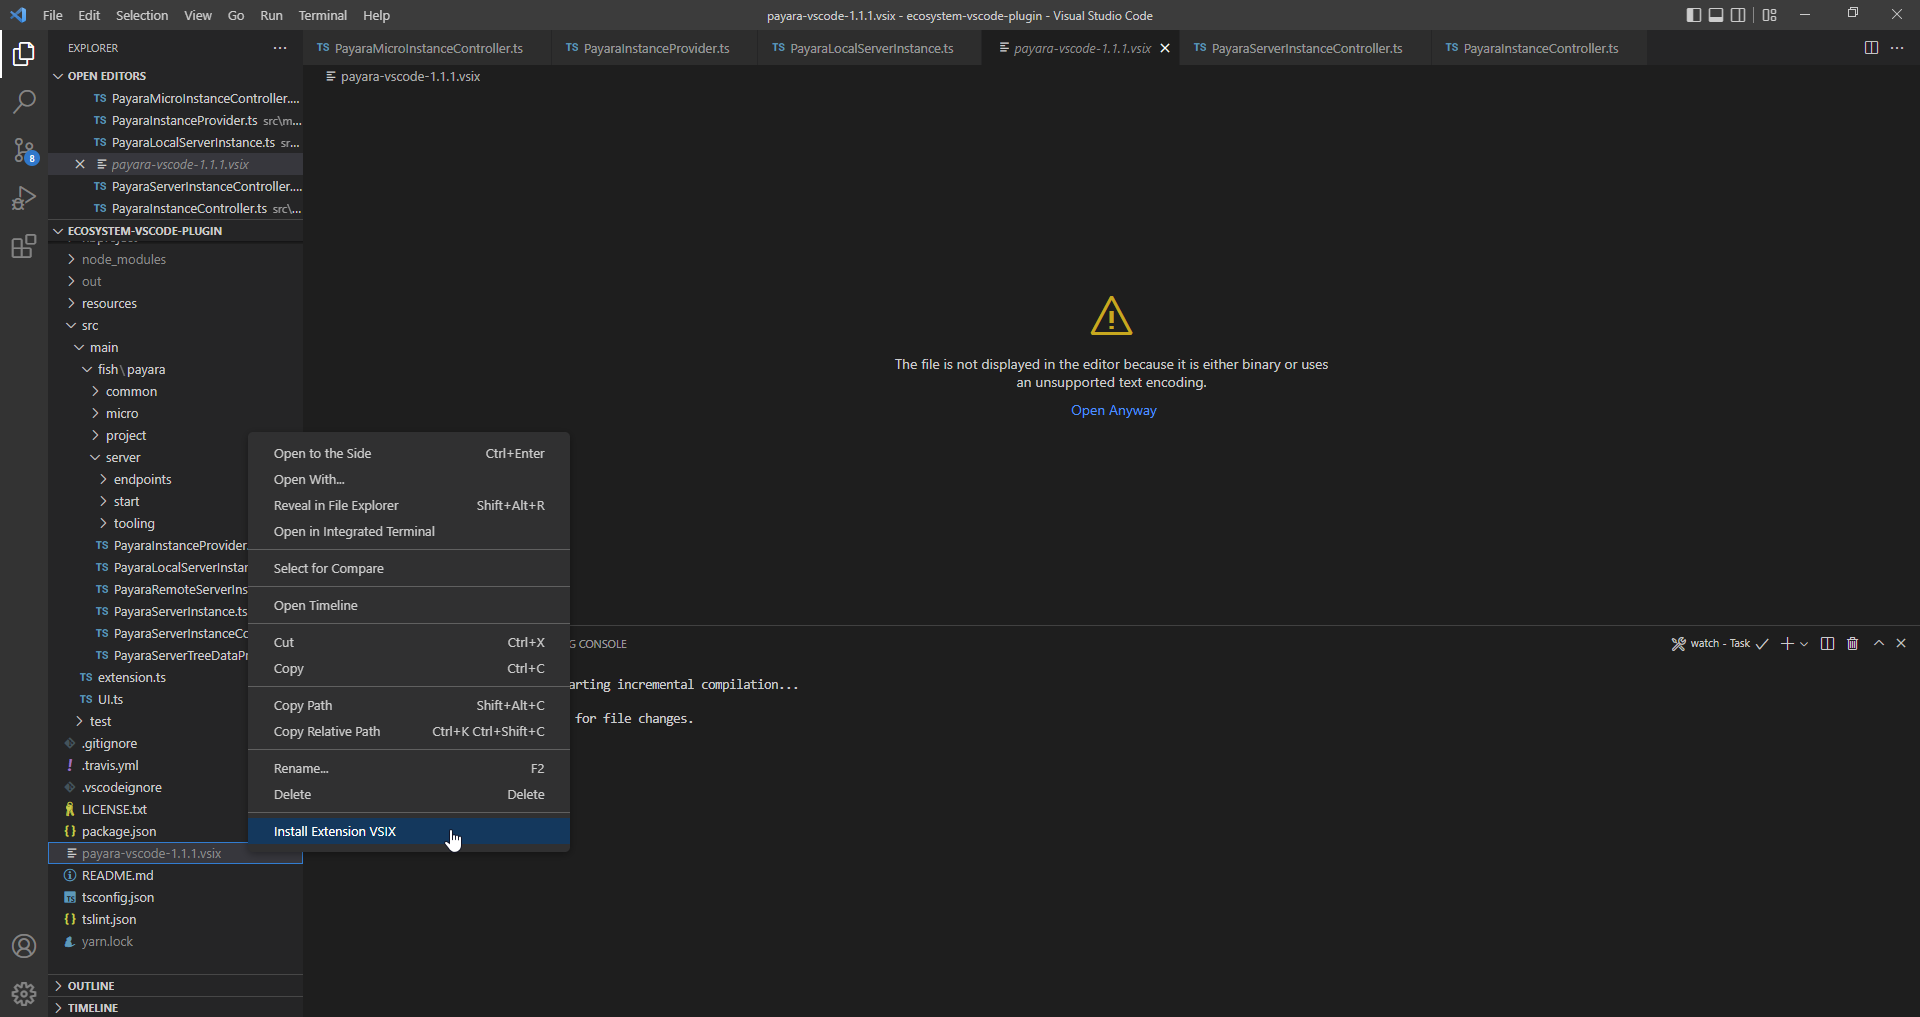
In the root directory of the project there will be a file payara-vscode-{version-number}.vsix which will be used to install into VS Code.